
So I'm running mast wires. ..there's an exit hole that's about 1/4 inch down near the bottom of the mast. It would be helpful if it was bigger but I don't want a portable folding mast. Can I enlarge it safely? And how much? Jazz

Jazz, I drilled a 5/8 inch hole six inches up from the bottom of my mast on the front face to exit the wires. I then inserted a 1/2 inch rubber grommet (available at hardware stores) in the hole before feeding the wires through it.. I drilled the hole on the forward side of the mast as opposed to the side thinking about some future accident where I dropped the mast into the tabernacle and possibly slice through those protruding wires. Two things I learned about boats, you always design around chafe since nothing is still on a boat and things rub all the time and the other is never leave a corner anywhere that is not radiused. Those sharp corners in a fall can be deadly. Have fun. Tom B <https://www.avast.com/sig-email> This email has been sent from a virus-free computer protected by Avast. www.avast.com <https://www.avast.com/sig-email> <#DDB4FAA8-2DD7-40BB-A1B8-4E2AA1F9FDF2> On Mon, Feb 8, 2016 at 11:41 PM, Jazzy <jazzydaze@gmail.com> wrote:
So I'm running mast wires. ..there's an exit hole that's about 1/4 inch down near the bottom of the mast. It would be helpful if it was bigger but I don't want a portable folding mast. Can I enlarge it safely? And how much?
Jazz

On 2/9/2016 9:11 AM, Thomas Buzzi wrote: Amen Tom, There is a huge difference between a "new" boat straight from the builder, and a "lived-in" boat where you have invested a lot of TLC. Things that usually need immediate correction are: - screw heads that are not properly countersunk; and any wire edges on the screwdriver slot should be removed. - If bolts holding hardware in place extend for more than about 1/16th inch from the nut, cut or grind them off flush with the nut face. - As you said; round off all sharp corners and edges. - If you have finger latches on locker doors then taper the inside edges of the straight hole so that your finger doesn't get caught if a rogue wave hits - Add locks or some sort of fastener to gasketed sail locker lids to keep them shut in the event of a knock-down - Check all hardware for sharp edges, and round them off The more you look and feel with your fingers, the more you will discover; fix every last item It's a labor of love - and for safety - that you appreciate every time you sail. Ciao, Connie
Jazz, I drilled a 5/8 inch hole six inches up from the bottom of my mast on the front face to exit the wires. I then inserted a 1/2 inch rubber grommet (available at hardware stores) in the hole before feeding the wires through it.. I drilled the hole on the forward side of the mast as opposed to the side thinking about some future accident where I dropped the mast into the tabernacle and possibly slice through those protruding wires. Two things I learned about boats, you always design around chafe since nothing is still on a boat and things rub all the time and the other is never leave a corner anywhere that is not radiused. Those sharp corners in a fall can be deadly. Have fun. Tom B <https://www.avast.com/sig-email> This email has been sent from a virus-free computer protected by Avast. www.avast.com <https://www.avast.com/sig-email> <#DDB4FAA8-2DD7-40BB-A1B8-4E2AA1F9FDF2>
On Mon, Feb 8, 2016 at 11:41 PM, Jazzy <jazzydaze@gmail.com> wrote:
So I'm running mast wires. ..there's an exit hole that's about 1/4 inch down near the bottom of the mast. It would be helpful if it was bigger but I don't want a portable folding mast. Can I enlarge it safely? And how much?
Jazz

unless the mast gets 'swiss cheesed' a single hole isn't going to be a concern. for the Sage 17's, and on my M17, i've installed a 1/2" grommet, as TomB posted, about 6" above the foot for the masthead light wire. avoid putting a bunch on holes 'in line' (up/down) and close together. -- :: Dave Scobie :: former M15 owner - www.freewebs.com/m15-named-scred :: M17 #375 SWEET PEA - www.m17-375.webs.com On 2/9/2016 9:11 AM, Thomas Buzzi wrote:
Jazz,
I drilled a 5/8 inch hole six inches up from the bottom of my mast on the front face to exit the wires. I then inserted a 1/2 inch rubber grommet (available at hardware stores) in the hole before feeding the wires through it.. I drilled the hole on the forward side of the mast as opposed to the side thinking about some future accident where I dropped the mast into the tabernacle and possibly slice through those protruding wires. Two things I learned about boats, you always design around chafe since nothing is still on a boat and things rub all the time and the other is never leave a corner anywhere that is not radiused. Those sharp corners in a fall can be deadly. Have fun. Tom B <https://www.avast.com/sig-email> This email has been sent from a virus-free computer protected by Avast. www.avast.com <https://www.avast.com/sig-email> <#DDB4FAA8-2DD7-40BB-A1B8-4E2AA1F9FDF2>
On Mon, Feb 8, 2016 at 11:41 PM, Jazzy <jazzydaze@gmail.com> wrote:
So I'm running mast wires. ..there's an exit hole that's about 1/4 inch
down near the bottom of the mast. It would be helpful if it was bigger but I don't want a portable folding mast. Can I enlarge it safely? And how much?
Jazz
Ok, I'm Goin a drillin! That's good news I'll try to post pics when I'm done of the through deck. Jazz On Feb 9, 2016 8:42 AM, "Dave Scobie" <scoobscobie@gmail.com> wrote:
unless the mast gets 'swiss cheesed' a single hole isn't going to be a concern. for the Sage 17's, and on my M17, i've installed a 1/2" grommet, as TomB posted, about 6" above the foot for the masthead light wire.
avoid putting a bunch on holes 'in line' (up/down) and close together.
-- :: Dave Scobie :: former M15 owner - www.freewebs.com/m15-named-scred :: M17 #375 SWEET PEA - www.m17-375.webs.com
On 2/9/2016 9:11 AM, Thomas Buzzi wrote:
Jazz,
I drilled a 5/8 inch hole six inches up from the bottom of my mast on
the
front face to exit the wires. I then inserted a 1/2 inch rubber grommet (available at hardware stores) in the hole before feeding the wires through it.. I drilled the hole on the forward side of the mast as opposed to the side thinking about some future accident where I dropped the mast into the tabernacle and possibly slice through those protruding wires. Two things I learned about boats, you always design around chafe since nothing is still on a boat and things rub all the time and the other is never leave a corner anywhere that is not radiused. Those sharp corners in a fall can be deadly. Have fun. Tom B <https://www.avast.com/sig-email> This email has been sent from a virus-free computer protected by Avast. www.avast.com <https://www.avast.com/sig-email> <#DDB4FAA8-2DD7-40BB-A1B8-4E2AA1F9FDF2>
On Mon, Feb 8, 2016 at 11:41 PM, Jazzy <jazzydaze@gmail.com> wrote:
So I'm running mast wires. ..there's an exit hole that's about 1/4 inch
down near the bottom of the mast. It would be helpful if it was bigger but I don't want a portable folding mast. Can I enlarge it safely? And how much?
Jazz
All good points, Connie. This email has been sent from a virus-free computer protected by Avast. www.avast.com <https://www.avast.com/sig-email> <#DDB4FAA8-2DD7-40BB-A1B8-4E2AA1F9FDF2> On Tue, Feb 9, 2016 at 10:30 AM, Conbert Benneck <chbenneck@gmail.com> wrote:
On 2/9/2016 9:11 AM, Thomas Buzzi wrote:
Amen Tom,
There is a huge difference between a "new" boat straight from the builder, and a "lived-in" boat where you have invested a lot of TLC.
Things that usually need immediate correction are:
- screw heads that are not properly countersunk; and any wire edges on the screwdriver slot should be removed.
- If bolts holding hardware in place extend for more than about 1/16th inch from the nut, cut or grind them off flush with the nut face.
- As you said; round off all sharp corners and edges.
- If you have finger latches on locker doors then taper the inside edges of the straight hole so that your finger doesn't get caught if a rogue wave hits
- Add locks or some sort of fastener to gasketed sail locker lids to keep them shut in the event of a knock-down
- Check all hardware for sharp edges, and round them off
The more you look and feel with your fingers, the more you will discover; fix every last item
It's a labor of love - and for safety - that you appreciate every time you sail.
Ciao,
Connie
Jazz,
I drilled a 5/8 inch hole six inches up from the bottom of my mast on the front face to exit the wires. I then inserted a 1/2 inch rubber grommet (available at hardware stores) in the hole before feeding the wires through it.. I drilled the hole on the forward side of the mast as opposed to the side thinking about some future accident where I dropped the mast into the tabernacle and possibly slice through those protruding wires. Two things I learned about boats, you always design around chafe since nothing is still on a boat and things rub all the time and the other is never leave a corner anywhere that is not radiused. Those sharp corners in a fall can be deadly. Have fun. Tom B <https://www.avast.com/sig-email> This email has been sent from a virus-free computer protected by Avast. www.avast.com <https://www.avast.com/sig-email> <#DDB4FAA8-2DD7-40BB-A1B8-4E2AA1F9FDF2>
On Mon, Feb 8, 2016 at 11:41 PM, Jazzy <jazzydaze@gmail.com> wrote:
So I'm running mast wires. ..there's an exit hole that's about 1/4 inch
down near the bottom of the mast. It would be helpful if it was bigger but I don't want a portable folding mast. Can I enlarge it safely? And how much?
Jazz

Speaking of wires in mast - that you don't want to hear slapping all night from down in the berth, or just slapping (chafing ;-) in general - one trick is to put three or four zip-ties every few feet on the wire as you feed it through, angled in different directions to make a triangle or rectangle of zip-tie ends sticking out and pressing against the inside of the mast and keeping the wire from slapping. I would use the black more UV- and heat-tolerant ones - even though inside the mast, they will probably last longer than the plain white ones. cheers, John S. On 02/09/2016 07:11 AM, Thomas Buzzi wrote:
Jazz, I drilled a 5/8 inch hole six inches up from the bottom of my mast on the front face to exit the wires. I then inserted a 1/2 inch rubber grommet (available at hardware stores) in the hole before feeding the wires through it.. I drilled the hole on the forward side of the mast as opposed to the side thinking about some future accident where I dropped the mast into the tabernacle and possibly slice through those protruding wires. Two things I learned about boats, you always design around chafe since nothing is still on a boat and things rub all the time and the other is never leave a corner anywhere that is not radiused. Those sharp corners in a fall can be deadly. Have fun. Tom B <https://www.avast.com/sig-email> This email has been sent from a virus-free computer protected by Avast. www.avast.com <https://www.avast.com/sig-email> <#DDB4FAA8-2DD7-40BB-A1B8-4E2AA1F9FDF2>
On Mon, Feb 8, 2016 at 11:41 PM, Jazzy <jazzydaze@gmail.com> wrote:
So I'm running mast wires. ..there's an exit hole that's about 1/4 inch down near the bottom of the mast. It would be helpful if it was bigger but I don't want a portable folding mast. Can I enlarge it safely? And how much?
Jazz
-- John Schinnerer - M.A., Whole Systems Design -------------------------------------------- - Eco-Living - Whole Systems Design Services People - Place - Learning - Integration john@eco-living.net - 510.982.1334 http://eco-living.net http://sociocracyconsulting.com

Another option to quiet the wire slapping inside the mast is to fill it with styrofoam packing peanuts. A piece of styrofoam swim noodle makes a nice "cork" in the ends to keep them from coming out. You also get the benefit of some flotation. I did this several years ago and it has worked very well with no issues at all. Larry Y M17 CornDog On Tue, Feb 9, 2016 at 1:28 PM, John Schinnerer <john@eco-living.net> wrote:
Speaking of wires in mast - that you don't want to hear slapping all night from down in the berth, or just slapping (chafing ;-) in general - one trick is to put three or four zip-ties every few feet on the wire as you feed it through, angled in different directions to make a triangle or rectangle of zip-tie ends sticking out and pressing against the inside of the mast and keeping the wire from slapping. I would use the black more UV- and heat-tolerant ones - even though inside the mast, they will probably last longer than the plain white ones.
cheers, John S.
On 02/09/2016 07:11 AM, Thomas Buzzi wrote:
Jazz, I drilled a 5/8 inch hole six inches up from the bottom of my mast on the front face to exit the wires. I then inserted a 1/2 inch rubber grommet (available at hardware stores) in the hole before feeding the wires through it.. I drilled the hole on the forward side of the mast as opposed to the side thinking about some future accident where I dropped the mast into the tabernacle and possibly slice through those protruding wires. Two things I learned about boats, you always design around chafe since nothing is still on a boat and things rub all the time and the other is never leave a corner anywhere that is not radiused. Those sharp corners in a fall can be deadly. Have fun. Tom B <https://www.avast.com/sig-email> This email has been sent from a virus-free computer protected by Avast. www.avast.com <https://www.avast.com/sig-email> <#DDB4FAA8-2DD7-40BB-A1B8-4E2AA1F9FDF2>
On Mon, Feb 8, 2016 at 11:41 PM, Jazzy <jazzydaze@gmail.com> wrote:
So I'm running mast wires. ..there's an exit hole that's about 1/4 inch
down near the bottom of the mast. It would be helpful if it was bigger but I don't want a portable folding mast. Can I enlarge it safely? And how much?
Jazz
-- John Schinnerer - M.A., Whole Systems Design
- Eco-Living - Whole Systems Design Services People - Place - Learning - Integration john@eco-living.net - 510.982.1334 http://eco-living.net http://sociocracyconsulting.com
On 2/9/2016 3:34 PM, Larry Yake wrote: Larry, What a great idea and solution. Now you tell me....! Connie
Another option to quiet the wire slapping inside the mast is to fill it with styrofoam packing peanuts. A piece of styrofoam swim noodle makes a nice "cork" in the ends to keep them from coming out. You also get the benefit of some flotation. I did this several years ago and it has worked very well with no issues at all.
Larry Y M17 CornDog
On Tue, Feb 9, 2016 at 1:28 PM, John Schinnerer <john@eco-living.net> wrote:
Speaking of wires in mast - that you don't want to hear slapping all night from down in the berth, or just slapping (chafing ;-) in general - one trick is to put three or four zip-ties every few feet on the wire as you feed it through, angled in different directions to make a triangle or rectangle of zip-tie ends sticking out and pressing against the inside of the mast and keeping the wire from slapping. I would use the black more UV- and heat-tolerant ones - even though inside the mast, they will probably last longer than the plain white ones.
cheers, John S.
On 02/09/2016 07:11 AM, Thomas Buzzi wrote:
Jazz, I drilled a 5/8 inch hole six inches up from the bottom of my mast on the front face to exit the wires. I then inserted a 1/2 inch rubber grommet (available at hardware stores) in the hole before feeding the wires through it.. I drilled the hole on the forward side of the mast as opposed to the side thinking about some future accident where I dropped the mast into the tabernacle and possibly slice through those protruding wires. Two things I learned about boats, you always design around chafe since nothing is still on a boat and things rub all the time and the other is never leave a corner anywhere that is not radiused. Those sharp corners in a fall can be deadly. Have fun. Tom B <https://www.avast.com/sig-email> This email has been sent from a virus-free computer protected by Avast. www.avast.com <https://www.avast.com/sig-email> <#DDB4FAA8-2DD7-40BB-A1B8-4E2AA1F9FDF2>
On Mon, Feb 8, 2016 at 11:41 PM, Jazzy <jazzydaze@gmail.com> wrote:
So I'm running mast wires. ..there's an exit hole that's about 1/4 inch
down near the bottom of the mast. It would be helpful if it was bigger but I don't want a portable folding mast. Can I enlarge it safely? And how much?
Jazz
-- John Schinnerer - M.A., Whole Systems Design
- Eco-Living - Whole Systems Design Services People - Place - Learning - Integration john@eco-living.net - 510.982.1334 http://eco-living.net http://sociocracyconsulting.com
Wires are in, grommets are in...zip ties in, wires turn on lights when clipped to a battery. Car locked in the driveway running. Doh! On Feb 9, 2016 2:30 PM, "Conbert Benneck" <chbenneck@gmail.com> wrote:
On 2/9/2016 3:34 PM, Larry Yake wrote:
Larry,
What a great idea and solution.
Now you tell me....!
Connie
Another option to quiet the wire slapping inside the mast is to fill it with styrofoam packing peanuts. A piece of styrofoam swim noodle makes a nice "cork" in the ends to keep them from coming out. You also get the benefit of some flotation. I did this several years ago and it has worked very well with no issues at all.
Larry Y M17 CornDog
On Tue, Feb 9, 2016 at 1:28 PM, John Schinnerer <john@eco-living.net> wrote:
Speaking of wires in mast - that you don't want to hear slapping all night
from down in the berth, or just slapping (chafing ;-) in general - one trick is to put three or four zip-ties every few feet on the wire as you feed it through, angled in different directions to make a triangle or rectangle of zip-tie ends sticking out and pressing against the inside of the mast and keeping the wire from slapping. I would use the black more UV- and heat-tolerant ones - even though inside the mast, they will probably last longer than the plain white ones.
cheers, John S.
On 02/09/2016 07:11 AM, Thomas Buzzi wrote:
Jazz,
I drilled a 5/8 inch hole six inches up from the bottom of my mast on the front face to exit the wires. I then inserted a 1/2 inch rubber grommet (available at hardware stores) in the hole before feeding the wires through it.. I drilled the hole on the forward side of the mast as opposed to the side thinking about some future accident where I dropped the mast into the tabernacle and possibly slice through those protruding wires. Two things I learned about boats, you always design around chafe since nothing is still on a boat and things rub all the time and the other is never leave a corner anywhere that is not radiused. Those sharp corners in a fall can be deadly. Have fun. Tom B <https://www.avast.com/sig-email> This email has been sent from a virus-free computer protected by Avast. www.avast.com <https://www.avast.com/sig-email> <#DDB4FAA8-2DD7-40BB-A1B8-4E2AA1F9FDF2>
On Mon, Feb 8, 2016 at 11:41 PM, Jazzy <jazzydaze@gmail.com> wrote:
So I'm running mast wires. ..there's an exit hole that's about 1/4 inch
down near the bottom of the mast. It would be helpful if it was bigger but I don't want a portable folding mast. Can I enlarge it safely? And how much?
Jazz
-- John Schinnerer - M.A., Whole Systems Design
- Eco-Living - Whole Systems Design Services People - Place - Learning - Integration john@eco-living.net - 510.982.1334 http://eco-living.net http://sociocracyconsulting.com
Hi Larry, Thanks for the suggestion of the foam peanuts since I have already run the mast wires and can't remember if I used the snap tie trick or not. Tom B This email has been sent from a virus-free computer protected by Avast. www.avast.com <https://www.avast.com/sig-email> <#DDB4FAA8-2DD7-40BB-A1B8-4E2AA1F9FDF2> On Tue, Feb 9, 2016 at 3:34 PM, Larry Yake <larryyake@gmail.com> wrote:
Another option to quiet the wire slapping inside the mast is to fill it with styrofoam packing peanuts. A piece of styrofoam swim noodle makes a nice "cork" in the ends to keep them from coming out. You also get the benefit of some flotation. I did this several years ago and it has worked very well with no issues at all.
Larry Y M17 CornDog
On Tue, Feb 9, 2016 at 1:28 PM, John Schinnerer <john@eco-living.net> wrote:
Speaking of wires in mast - that you don't want to hear slapping all night from down in the berth, or just slapping (chafing ;-) in general - one trick is to put three or four zip-ties every few feet on the wire as you feed it through, angled in different directions to make a triangle or rectangle of zip-tie ends sticking out and pressing against the inside of the mast and keeping the wire from slapping. I would use the black more UV- and heat-tolerant ones - even though inside the mast, they will probably last longer than the plain white ones.
cheers, John S.
On 02/09/2016 07:11 AM, Thomas Buzzi wrote:
Jazz, I drilled a 5/8 inch hole six inches up from the bottom of my mast on the front face to exit the wires. I then inserted a 1/2 inch rubber grommet (available at hardware stores) in the hole before feeding the wires through it.. I drilled the hole on the forward side of the mast as opposed to the side thinking about some future accident where I dropped the mast into the tabernacle and possibly slice through those protruding wires. Two things I learned about boats, you always design around chafe since nothing is still on a boat and things rub all the time and the other is never leave a corner anywhere that is not radiused. Those sharp corners in a fall can be deadly. Have fun. Tom B <https://www.avast.com/sig-email> This email has been sent from a virus-free computer protected by Avast. www.avast.com <https://www.avast.com/sig-email> <#DDB4FAA8-2DD7-40BB-A1B8-4E2AA1F9FDF2>
On Mon, Feb 8, 2016 at 11:41 PM, Jazzy <jazzydaze@gmail.com> wrote:
So I'm running mast wires. ..there's an exit hole that's about 1/4 inch
down near the bottom of the mast. It would be helpful if it was bigger but I don't want a portable folding mast. Can I enlarge it safely? And how much?
Jazz
-- John Schinnerer - M.A., Whole Systems Design
- Eco-Living - Whole Systems Design Services People - Place - Learning - Integration john@eco-living.net - 510.982.1334 http://eco-living.net http://sociocracyconsulting.com
Ok, so all drilled and the through deck is in. Its loosely screwed with sealant drying for tightening tomorrow. Steaming/decklight is installed. Anchor light is installed. Tomorrow it gets wired into the switch panel. Gonna need a bigger panel I think, but for now I'll use a couple of switches I have laying around. So here's some pics. I'll try to get steaming light pic tomorrow. It got dark! Here's the through hull... https://www.dropbox.com/s/qn29hc195uyy5x4/20160209_182415.jpg?dl=0 Here's how my mainsheet is rigged, prob not great for racing but totally out of the way for cruising... https://www.dropbox.com/s/rdwb1tvf0jdo7ry/20160209_172631.jpg?dl=0 And here's how it all exited from the mast...seems like I could have done this better, but I'm a noob and it was the best I could think of... https://www.dropbox.com/s/ohw6nliz0wnat89/20160209_152745.jpg?dl=0 And to keep things from being to dull, here's the one and only time I've been out on it! LOL https://www.dropbox.com/s/n3n46bxvd2umdio/20160118_120353.jpg?dl=0 Jazz PS. If you guys are looking for a temp way to share pics until you all decide on something, DropBox works great. You can put dropbox on your phone and your computer and your wifes phone and your wifes computer, and it always stays up to date. If you change something in it on your phone lets say, it changes everywhere. You just have to "share" your pic with DropBox, then open it in DropBox and right click for the "share dropbox link". The link will automatically go to your clipboard, then you just paste in your email. So long as you keep your drop box, your link will work in here. NOT AFFILIATED, but a cool program! I can look at El Nino pics from any computer or phone that has dropbox :) On Tue, Feb 9, 2016 at 4:11 PM, Thomas Buzzi <thomaspbuzzi@gmail.com> wrote:
Hi Larry, Thanks for the suggestion of the foam peanuts since I have already run the mast wires and can't remember if I used the snap tie trick or not. Tom B
This email has been sent from a virus-free computer protected by Avast. www.avast.com <https://www.avast.com/sig-email> <#DDB4FAA8-2DD7-40BB-A1B8-4E2AA1F9FDF2>
On Tue, Feb 9, 2016 at 3:34 PM, Larry Yake <larryyake@gmail.com> wrote:
Another option to quiet the wire slapping inside the mast is to fill it with styrofoam packing peanuts. A piece of styrofoam swim noodle makes a nice "cork" in the ends to keep them from coming out. You also get the benefit of some flotation. I did this several years ago and it has worked very well with no issues at all.
Larry Y M17 CornDog
On Tue, Feb 9, 2016 at 1:28 PM, John Schinnerer <john@eco-living.net> wrote:
Speaking of wires in mast - that you don't want to hear slapping all night from down in the berth, or just slapping (chafing ;-) in general - one trick is to put three or four zip-ties every few feet on the wire as you feed it through, angled in different directions to make a triangle or rectangle of zip-tie ends sticking out and pressing against the inside of the mast and keeping the wire from slapping. I would use the black more UV- and heat-tolerant ones - even though inside the mast, they will probably last longer than the plain white ones.
cheers, John S.
On 02/09/2016 07:11 AM, Thomas Buzzi wrote:
Jazz, I drilled a 5/8 inch hole six inches up from the bottom of my mast on the front face to exit the wires. I then inserted a 1/2 inch rubber grommet (available at hardware stores) in the hole before feeding the wires through it.. I drilled the hole on the forward side of the mast as opposed to the side thinking about some future accident where I dropped the mast into the tabernacle and possibly slice through those protruding wires. Two things I learned about boats, you always design around chafe since nothing is still on a boat and things rub all the time and the other is never leave a corner anywhere that is not radiused. Those sharp corners in a fall can be deadly. Have fun. Tom B <https://www.avast.com/sig-email> This email has been sent from a virus-free computer protected by Avast. www.avast.com <https://www.avast.com/sig-email> <#DDB4FAA8-2DD7-40BB-A1B8-4E2AA1F9FDF2>
On Mon, Feb 8, 2016 at 11:41 PM, Jazzy <jazzydaze@gmail.com> wrote:
So I'm running mast wires. ..there's an exit hole that's about 1/4 inch
down near the bottom of the mast. It would be helpful if it was bigger but I don't want a portable folding mast. Can I enlarge it safely? And how much?
Jazz
-- John Schinnerer - M.A., Whole Systems Design
- Eco-Living - Whole Systems Design Services People - Place - Learning - Integration john@eco-living.net - 510.982.1334 http://eco-living.net http://sociocracyconsulting.com
Nice pics, Jazz. If you want to bunch the rest of those wires coming out of you mast you can use flexible corrigated plastic shield which is available at auto supply stores. It is slit up the side so you can put over your wires and not have to take anything apart. I use a little self sealing vinly tape to close it up every couple of inches with a wrap and it works well. This email has been sent from a virus-free computer protected by Avast. www.avast.com <https://www.avast.com/sig-email> <#DDB4FAA8-2DD7-40BB-A1B8-4E2AA1F9FDF2> On Tue, Feb 9, 2016 at 9:09 PM, Jazzy <jazzydaze@gmail.com> wrote:
Ok, so all drilled and the through deck is in. Its loosely screwed with sealant drying for tightening tomorrow. Steaming/decklight is installed. Anchor light is installed. Tomorrow it gets wired into the switch panel. Gonna need a bigger panel I think, but for now I'll use a couple of switches I have laying around. So here's some pics. I'll try to get steaming light pic tomorrow. It got dark!
Here's the through hull... https://www.dropbox.com/s/qn29hc195uyy5x4/20160209_182415.jpg?dl=0
Here's how my mainsheet is rigged, prob not great for racing but totally out of the way for cruising... https://www.dropbox.com/s/rdwb1tvf0jdo7ry/20160209_172631.jpg?dl=0
And here's how it all exited from the mast...seems like I could have done this better, but I'm a noob and it was the best I could think of... https://www.dropbox.com/s/ohw6nliz0wnat89/20160209_152745.jpg?dl=0
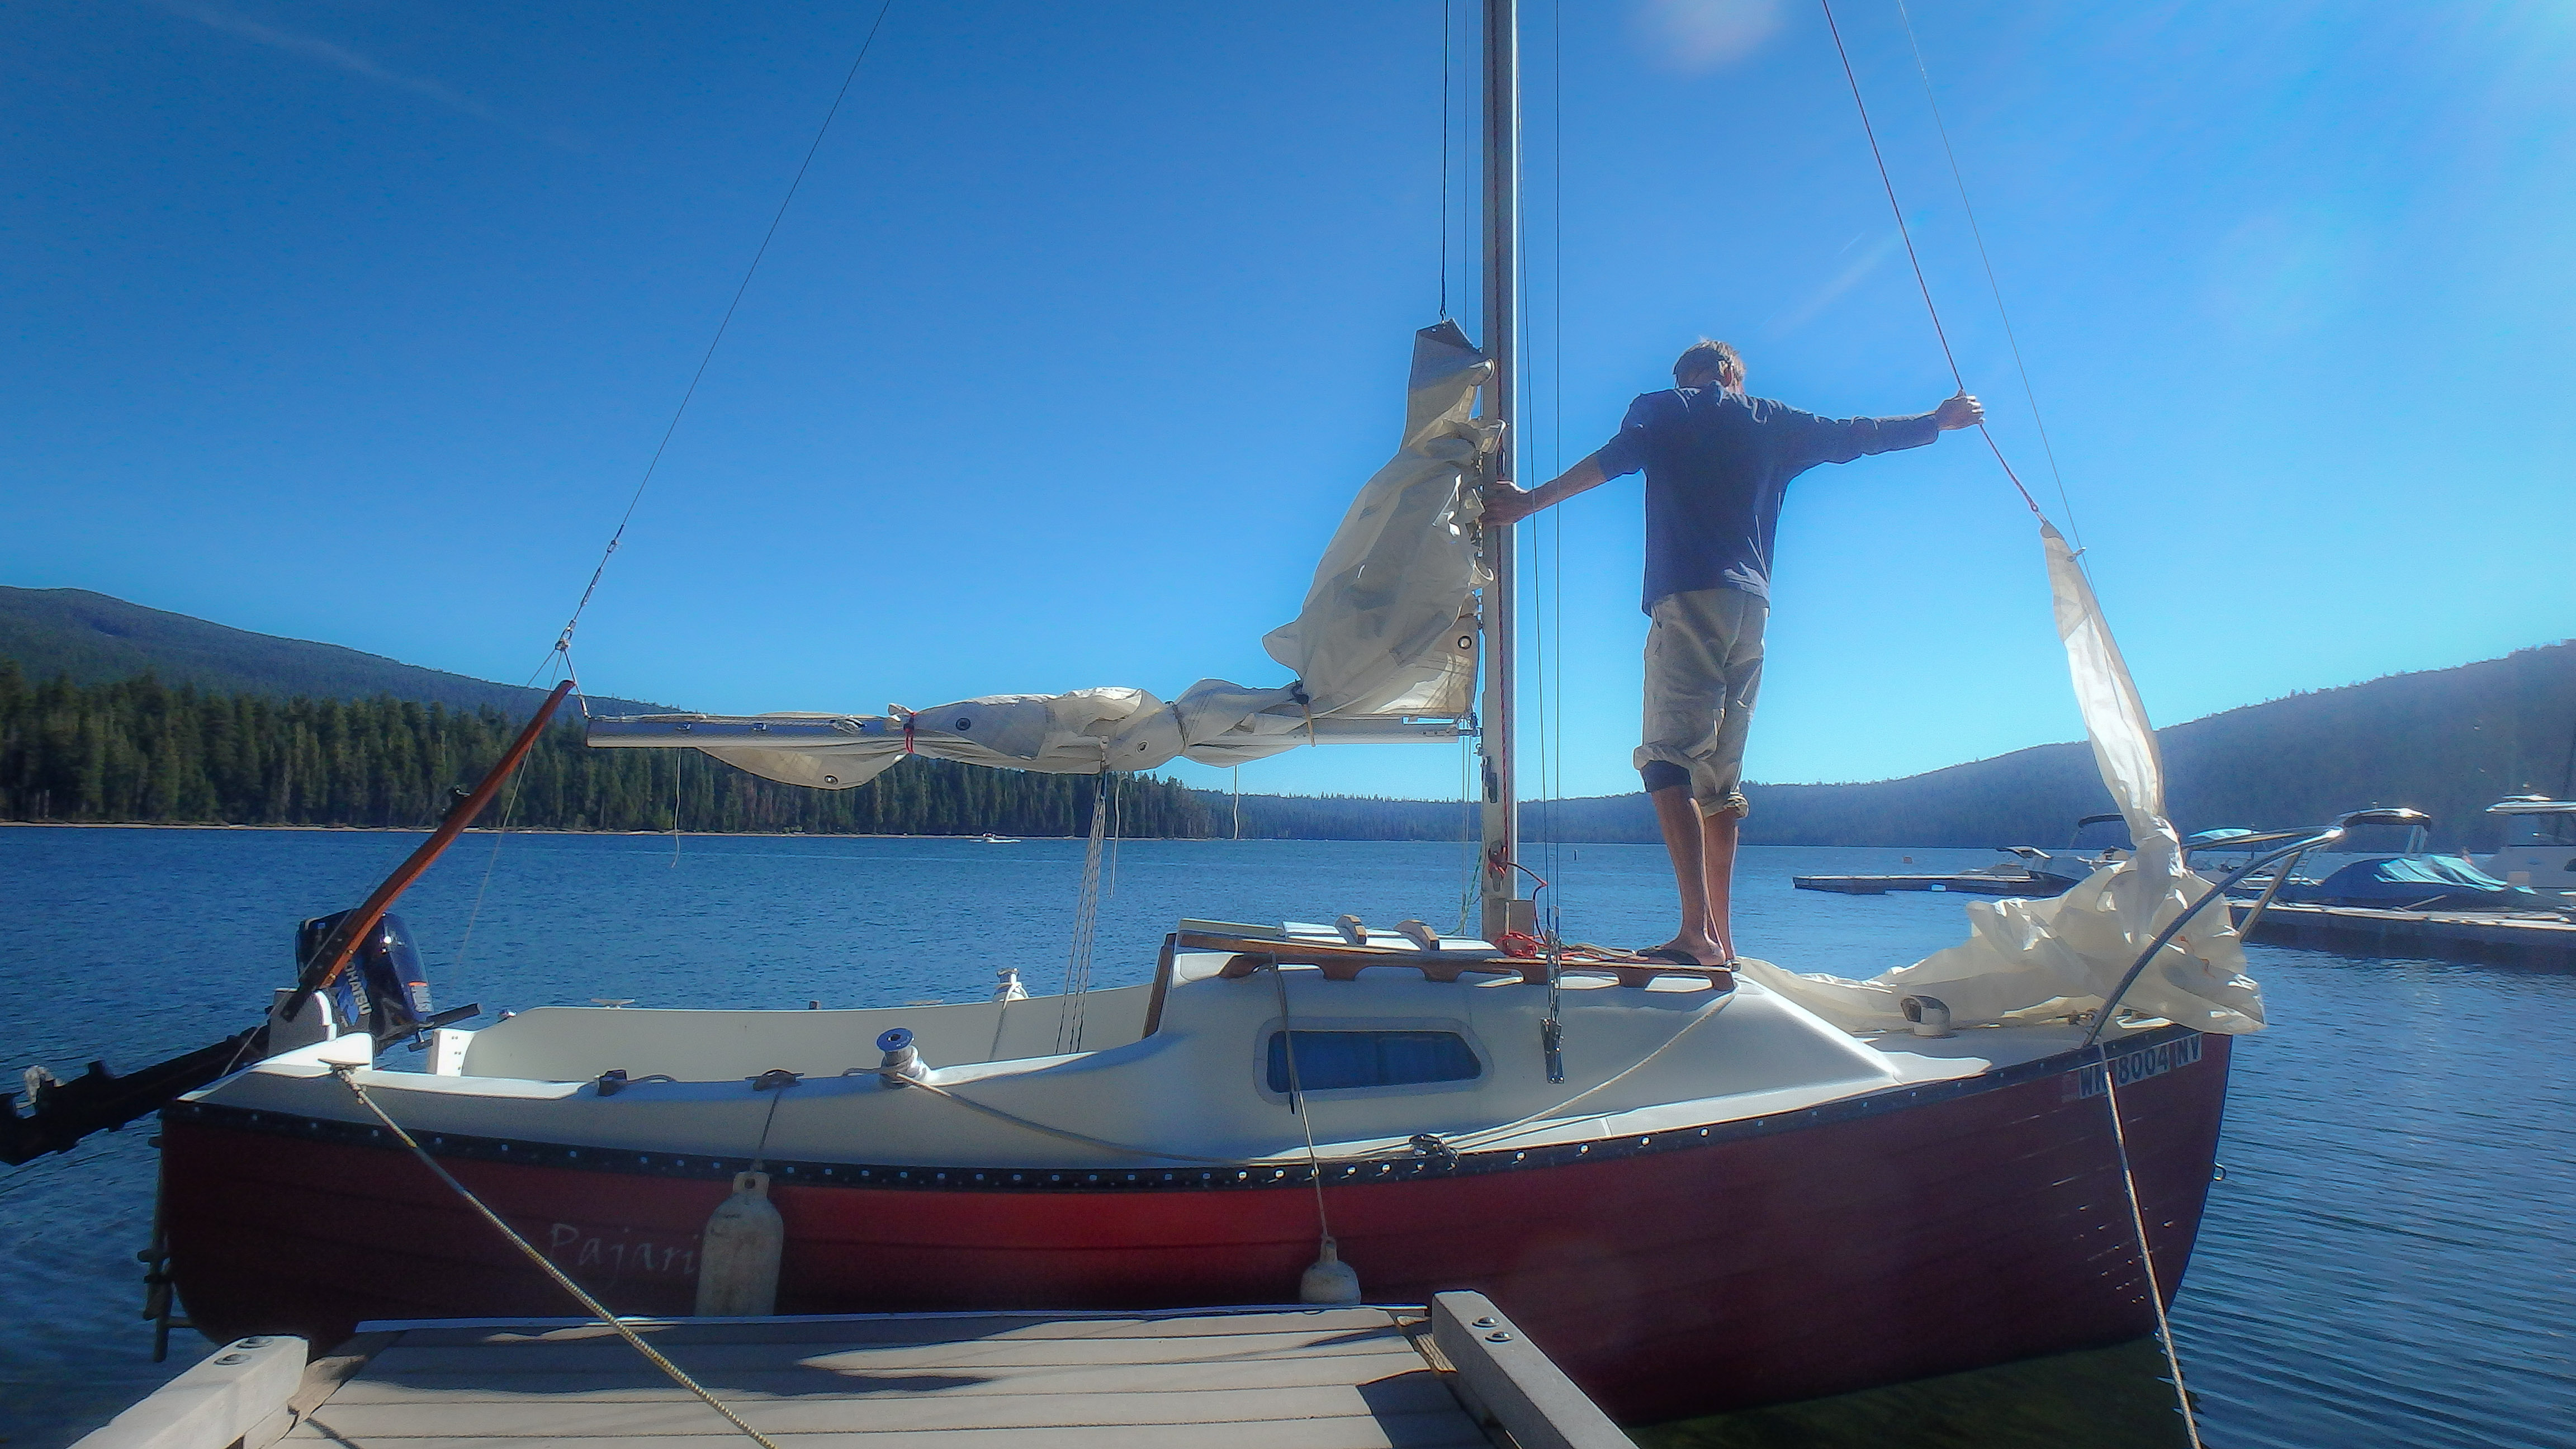
And to keep things from being to dull, here's the one and only time I've been out on it! LOL https://www.dropbox.com/s/n3n46bxvd2umdio/20160118_120353.jpg?dl=0
Jazz
PS. If you guys are looking for a temp way to share pics until you all decide on something, DropBox works great. You can put dropbox on your phone and your computer and your wifes phone and your wifes computer, and it always stays up to date. If you change something in it on your phone lets say, it changes everywhere. You just have to "share" your pic with DropBox, then open it in DropBox and right click for the "share dropbox link". The link will automatically go to your clipboard, then you just paste in your email. So long as you keep your drop box, your link will work in here. NOT AFFILIATED, but a cool program! I can look at El Nino pics from any computer or phone that has dropbox :)
On Tue, Feb 9, 2016 at 4:11 PM, Thomas Buzzi <thomaspbuzzi@gmail.com> wrote:
Hi Larry, Thanks for the suggestion of the foam peanuts since I have already run the mast wires and can't remember if I used the snap tie trick or not. Tom B
This email has been sent from a virus-free computer protected by Avast. www.avast.com <https://www.avast.com/sig-email> <#DDB4FAA8-2DD7-40BB-A1B8-4E2AA1F9FDF2>
On Tue, Feb 9, 2016 at 3:34 PM, Larry Yake <larryyake@gmail.com> wrote:
Another option to quiet the wire slapping inside the mast is to fill it with styrofoam packing peanuts. A piece of styrofoam swim noodle makes a nice "cork" in the ends to keep them from coming out. You also get the benefit of some flotation. I did this several years ago and it has worked very well with no issues at all.
Larry Y M17 CornDog
On Tue, Feb 9, 2016 at 1:28 PM, John Schinnerer <john@eco-living.net> wrote:
Speaking of wires in mast - that you don't want to hear slapping all night from down in the berth, or just slapping (chafing ;-) in general - one trick is to put three or four zip-ties every few feet on the wire as you feed it through, angled in different directions to make a triangle or rectangle of zip-tie ends sticking out and pressing against the inside of the mast and keeping the wire from slapping. I would use the black more UV- and heat-tolerant ones - even though inside the mast, they will probably last longer than the plain white ones.
cheers, John S.
On 02/09/2016 07:11 AM, Thomas Buzzi wrote:
Jazz, I drilled a 5/8 inch hole six inches up from the bottom of my mast on the front face to exit the wires. I then inserted a 1/2 inch rubber grommet (available at hardware stores) in the hole before feeding the wires through it.. I drilled the hole on the forward side of the mast as opposed to the side thinking about some future accident where I dropped the mast into the tabernacle and possibly slice through those protruding wires. Two things I learned about boats, you always design around chafe since nothing is still on a boat and things rub all the time and the other is never leave a corner anywhere that is not radiused. Those sharp corners in a fall can be deadly. Have fun. Tom B <https://www.avast.com/sig-email> This email has been sent from a virus-free computer protected by Avast. www.avast.com <https://www.avast.com/sig-email> <#DDB4FAA8-2DD7-40BB-A1B8-4E2AA1F9FDF2>
On Mon, Feb 8, 2016 at 11:41 PM, Jazzy <jazzydaze@gmail.com> wrote:
So I'm running mast wires. ..there's an exit hole that's about 1/4 inch
down near the bottom of the mast. It would be helpful if it was bigger but I don't want a portable folding mast. Can I enlarge it safely? And how much?
Jazz
-- John Schinnerer - M.A., Whole Systems Design
- Eco-Living - Whole Systems Design Services People - Place - Learning - Integration john@eco-living.net - 510.982.1334 http://eco-living.net http://sociocracyconsulting.com
Yup yup, I was thinking something like that. Man that was hard work, two days solid. Snaking through the mast was a bitch, but the wiring snake is def the way to go, 11 bucks, well worth it. Jazz On Feb 9, 2016 7:40 PM, "Thomas Buzzi" <thomaspbuzzi@gmail.com> wrote:
Nice pics, Jazz. If you want to bunch the rest of those wires coming out of you mast you can use flexible corrigated plastic shield which is available at auto supply stores. It is slit up the side so you can put over your wires and not have to take anything apart. I use a little self sealing vinly tape to close it up every couple of inches with a wrap and it works well.
This email has been sent from a virus-free computer protected by Avast. www.avast.com <https://www.avast.com/sig-email> <#DDB4FAA8-2DD7-40BB-A1B8-4E2AA1F9FDF2>
On Tue, Feb 9, 2016 at 9:09 PM, Jazzy <jazzydaze@gmail.com> wrote:
Ok, so all drilled and the through deck is in. Its loosely screwed with sealant drying for tightening tomorrow. Steaming/decklight is installed. Anchor light is installed. Tomorrow it gets wired into the switch panel. Gonna need a bigger panel I think, but for now I'll use a couple of switches I have laying around. So here's some pics. I'll try to get steaming light pic tomorrow. It got dark!
Here's the through hull... https://www.dropbox.com/s/qn29hc195uyy5x4/20160209_182415.jpg?dl=0
Here's how my mainsheet is rigged, prob not great for racing but totally out of the way for cruising... https://www.dropbox.com/s/rdwb1tvf0jdo7ry/20160209_172631.jpg?dl=0
And here's how it all exited from the mast...seems like I could have done this better, but I'm a noob and it was the best I could think of... https://www.dropbox.com/s/ohw6nliz0wnat89/20160209_152745.jpg?dl=0
And to keep things from being to dull, here's the one and only time I've been out on it! LOL https://www.dropbox.com/s/n3n46bxvd2umdio/20160118_120353.jpg?dl=0
Jazz
PS. If you guys are looking for a temp way to share pics until you all decide on something, DropBox works great. You can put dropbox on your phone and your computer and your wifes phone and your wifes computer, and it always stays up to date. If you change something in it on your phone lets say, it changes everywhere. You just have to "share" your pic with DropBox, then open it in DropBox and right click for the "share dropbox link". The link will automatically go to your clipboard, then you just paste in your email. So long as you keep your drop box, your link will work in here. NOT AFFILIATED, but a cool program! I can look at El Nino pics from any computer or phone that has dropbox :)
On Tue, Feb 9, 2016 at 4:11 PM, Thomas Buzzi <thomaspbuzzi@gmail.com> wrote:
Hi Larry, Thanks for the suggestion of the foam peanuts since I have already run the mast wires and can't remember if I used the snap tie trick or not. Tom B
This email has been sent from a virus-free computer protected by Avast. www.avast.com <https://www.avast.com/sig-email> <#DDB4FAA8-2DD7-40BB-A1B8-4E2AA1F9FDF2>
On Tue, Feb 9, 2016 at 3:34 PM, Larry Yake <larryyake@gmail.com> wrote:
Another option to quiet the wire slapping inside the mast is to fill it with styrofoam packing peanuts. A piece of styrofoam swim noodle makes a nice "cork" in the ends to keep them from coming out. You also get the benefit of some flotation. I did this several years ago and it has worked very well with no issues at all.
Larry Y M17 CornDog
On Tue, Feb 9, 2016 at 1:28 PM, John Schinnerer <john@eco-living.net
wrote:
Speaking of wires in mast - that you don't want to hear slapping all night from down in the berth, or just slapping (chafing ;-) in general - one trick is to put three or four zip-ties every few feet on the wire as you feed it through, angled in different directions to make a triangle or rectangle of zip-tie ends sticking out and pressing against the inside of the mast and keeping the wire from slapping. I would use the black more UV- and heat-tolerant ones - even though inside the mast, they will probably last longer than the plain white ones.
cheers, John S.
On 02/09/2016 07:11 AM, Thomas Buzzi wrote:
Jazz, I drilled a 5/8 inch hole six inches up from the bottom of my mast on the front face to exit the wires. I then inserted a 1/2 inch rubber grommet (available at hardware stores) in the hole before feeding the wires through it.. I drilled the hole on the forward side of the mast as opposed to the side thinking about some future accident where I dropped the mast into the tabernacle and possibly slice through those protruding wires. Two things I learned about boats, you always design around chafe since nothing is still on a boat and things rub all the time and the other is never leave a corner anywhere that is not radiused. Those sharp corners in a fall can be deadly. Have fun. Tom B <https://www.avast.com/sig-email> This email has been sent from a virus-free computer protected by Avast. www.avast.com <https://www.avast.com/sig-email> <#DDB4FAA8-2DD7-40BB-A1B8-4E2AA1F9FDF2>
On Mon, Feb 8, 2016 at 11:41 PM, Jazzy <jazzydaze@gmail.com> wrote:
So I'm running mast wires. ..there's an exit hole that's about 1/4 inch > down near the bottom of the mast. It would be helpful if it was bigger > but > I don't want a portable folding mast. Can I enlarge it safely? And how > much? > > Jazz > > -- John Schinnerer - M.A., Whole Systems Design
- Eco-Living - Whole Systems Design Services People - Place - Learning - Integration john@eco-living.net - 510.982.1334 http://eco-living.net http://sociocracyconsulting.com

On Feb 9, 2016, at 8:39 PM, Thomas Buzzi <thomaspbuzzi@gmail.com> wrote:
Nice pics, Jazz. If you want to bunch the rest of those wires coming out of you mast you can use flexible corrigated plastic shield which is available at auto supply stores.
I found this stuff for bundling wires: http://www.mcmaster.com/#standard-cable-sleeving/=11ctsn0 It is durable and looks very neat. I’d like to mention McMaster-Carr (www.mcmaster.com) as #1 on my list of “if you don’t know about this place, you’re really missing out” sites. If you ever build or fix anything at all, you should know about them.
Nice site! Finally got around to a looksie... Jazz On Mar 1, 2016 4:49 PM, "David Rifkind" <drifkind@acm.org> wrote:
On Feb 9, 2016, at 8:39 PM, Thomas Buzzi <thomaspbuzzi@gmail.com> wrote:
Nice pics, Jazz. If you want to bunch the rest of those wires coming out of you mast you can use flexible corrigated plastic shield which is available at auto supply stores.
I found this stuff for bundling wires:
http://www.mcmaster.com/#standard-cable-sleeving/=11ctsn0
It is durable and looks very neat.
I’d like to mention McMaster-Carr (www.mcmaster.com) as #1 on my list of “if you don’t know about this place, you’re really missing out” sites. If you ever build or fix anything at all, you should know about them.
Thanks for the pointer to this supplier. Amazing variety. Bronze rod for example - for replacing slide-up rudder rod or having spare. Anyone know what kind of bronze was used on the older IdaSailer models (Jerry?)? They have a dozen different types... cheers, John S. On 03/01/2016 04:49 PM, David Rifkind wrote:
On Feb 9, 2016, at 8:39 PM, Thomas Buzzi <thomaspbuzzi@gmail.com> wrote:
Nice pics, Jazz. If you want to bunch the rest of those wires coming out of you mast you can use flexible corrigated plastic shield which is available at auto supply stores.
I found this stuff for bundling wires:
http://www.mcmaster.com/#standard-cable-sleeving/=11ctsn0
It is durable and looks very neat.
I’d like to mention McMaster-Carr (www.mcmaster.com) as #1 on my list of “if you don’t know about this place, you’re really missing out” sites. If you ever build or fix anything at all, you should know about them.
-- John Schinnerer - M.A., Whole Systems Design -------------------------------------------- - Eco-Living - Whole Systems Design Services People - Place - Learning - Integration john@eco-living.net - 510.982.1334 http://eco-living.net http://sociocracyconsulting.com

I don't know what Idasailor uses, but aluminum bronze is the best, followed by silicon br. Either one are way better than stainless- springier, no crevasse corrosion, and gets slicker with use instead of galling. (slicker than snot on a doorknob). -----Original Message----- From: John Schinnerer Sent: Tuesday, March 08, 2016 4:51 PM To: For and about Montgomery Sailboats Subject: Re: M_Boats: Mast drilling.... Thanks for the pointer to this supplier. Amazing variety. Bronze rod for example - for replacing slide-up rudder rod or having spare. Anyone know what kind of bronze was used on the older IdaSailer models (Jerry?)? They have a dozen different types... cheers, John S. On 03/01/2016 04:49 PM, David Rifkind wrote:
On Feb 9, 2016, at 8:39 PM, Thomas Buzzi <thomaspbuzzi@gmail.com> wrote:
Nice pics, Jazz. If you want to bunch the rest of those wires coming out of you mast you can use flexible corrigated plastic shield which is available at auto supply stores.
I found this stuff for bundling wires:
http://www.mcmaster.com/#standard-cable-sleeving/=11ctsn0
It is durable and looks very neat.
I’d like to mention McMaster-Carr (www.mcmaster.com) as #1 on my list of “if you don’t know about this place, you’re really missing out” sites. If you ever build or fix anything at all, you should know about them.
-- John Schinnerer - M.A., Whole Systems Design -------------------------------------------- - Eco-Living - Whole Systems Design Services People - Place - Learning - Integration john@eco-living.net - 510.982.1334 http://eco-living.net http://sociocracyconsulting.com
Congratulations, and thanks for all the pics...I learn something from almost every one I see of a sister ship. For example: Your hatch has only one wood stiffener, at very rear. Mine has two, splitting the hatch into thirds (front/middle/rear); and the rear edge of the hatch is cracked in the center, undoubtedly from being stood on a time too many with no reinforcing. So I'll move one of mine to the rear, or add one... Your mainsheet is what I was thinking when you described it - essentially same as a Potter 19 or an Ensenada 20 (and probably lotsa others but those are two I've sailed with same basic mainsheet rigging). Definitely out of the way, but I'm not crazy about having the sheet always lead from one side. It's an awkward angle to mind the sheet when sitting on the same side, for me anyhow. Wow, fancy through-deck connector! A tip for anything else you need to bed, or re-bed - ditch the nasty (and pricey) sticky white goo, use good quality butyl tape (not 'tape' like scotch or masking; comes on a roll but is a flexible bedding compound, used on boats, RVs, etc.). For example this Dicor brand stuff: http://www.amazon.com/gp/product/B001FCB4JS?psc=1&redirect=true&ref_=oh_aui_... Seals "forever" and never hardens and also comes off easy. Here is one good site with photos and details of how & why, this is page one of three, page two gets into more details - this guy also sells the tape he uses, see page three (I did some research and Dicor came up as a quality product so I went with that): http://www.pbase.com/mainecruising/rebedding_hardware&page=1 cheers, John S. On 02/09/2016 07:09 PM, Jazzy wrote:
Ok, so all drilled and the through deck is in. Its loosely screwed with sealant drying for tightening tomorrow. Steaming/decklight is installed. Anchor light is installed. Tomorrow it gets wired into the switch panel. Gonna need a bigger panel I think, but for now I'll use a couple of switches I have laying around. So here's some pics. I'll try to get steaming light pic tomorrow. It got dark!
Here's the through hull... https://www.dropbox.com/s/qn29hc195uyy5x4/20160209_182415.jpg?dl=0
Here's how my mainsheet is rigged, prob not great for racing but totally out of the way for cruising... https://www.dropbox.com/s/rdwb1tvf0jdo7ry/20160209_172631.jpg?dl=0
And here's how it all exited from the mast...seems like I could have done this better, but I'm a noob and it was the best I could think of... https://www.dropbox.com/s/ohw6nliz0wnat89/20160209_152745.jpg?dl=0
And to keep things from being to dull, here's the one and only time I've been out on it! LOL https://www.dropbox.com/s/n3n46bxvd2umdio/20160118_120353.jpg?dl=0
Jazz
PS. If you guys are looking for a temp way to share pics until you all decide on something, DropBox works great. You can put dropbox on your phone and your computer and your wifes phone and your wifes computer, and it always stays up to date. If you change something in it on your phone lets say, it changes everywhere. You just have to "share" your pic with DropBox, then open it in DropBox and right click for the "share dropbox link". The link will automatically go to your clipboard, then you just paste in your email. So long as you keep your drop box, your link will work in here. NOT AFFILIATED, but a cool program! I can look at El Nino pics from any computer or phone that has dropbox :)
On Tue, Feb 9, 2016 at 4:11 PM, Thomas Buzzi <thomaspbuzzi@gmail.com> wrote:
Hi Larry, Thanks for the suggestion of the foam peanuts since I have already run the mast wires and can't remember if I used the snap tie trick or not. Tom B
This email has been sent from a virus-free computer protected by Avast. www.avast.com <https://www.avast.com/sig-email> <#DDB4FAA8-2DD7-40BB-A1B8-4E2AA1F9FDF2>
On Tue, Feb 9, 2016 at 3:34 PM, Larry Yake <larryyake@gmail.com> wrote:
Another option to quiet the wire slapping inside the mast is to fill it with styrofoam packing peanuts. A piece of styrofoam swim noodle makes a nice "cork" in the ends to keep them from coming out. You also get the benefit of some flotation. I did this several years ago and it has worked very well with no issues at all.
Larry Y M17 CornDog
On Tue, Feb 9, 2016 at 1:28 PM, John Schinnerer <john@eco-living.net> wrote:
Speaking of wires in mast - that you don't want to hear slapping all night from down in the berth, or just slapping (chafing ;-) in general - one trick is to put three or four zip-ties every few feet on the wire as you feed it through, angled in different directions to make a triangle or rectangle of zip-tie ends sticking out and pressing against the inside of the mast and keeping the wire from slapping. I would use the black more UV- and heat-tolerant ones - even though inside the mast, they will probably last longer than the plain white ones.
cheers, John S.
On 02/09/2016 07:11 AM, Thomas Buzzi wrote:
Jazz, I drilled a 5/8 inch hole six inches up from the bottom of my mast on the front face to exit the wires. I then inserted a 1/2 inch rubber grommet (available at hardware stores) in the hole before feeding the wires through it.. I drilled the hole on the forward side of the mast as opposed to the side thinking about some future accident where I dropped the mast into the tabernacle and possibly slice through those protruding wires. Two things I learned about boats, you always design around chafe since nothing is still on a boat and things rub all the time and the other is never leave a corner anywhere that is not radiused. Those sharp corners in a fall can be deadly. Have fun. Tom B <https://www.avast.com/sig-email> This email has been sent from a virus-free computer protected by Avast. www.avast.com <https://www.avast.com/sig-email> <#DDB4FAA8-2DD7-40BB-A1B8-4E2AA1F9FDF2>
On Mon, Feb 8, 2016 at 11:41 PM, Jazzy <jazzydaze@gmail.com> wrote:
So I'm running mast wires. ..there's an exit hole that's about 1/4 inch
down near the bottom of the mast. It would be helpful if it was bigger but I don't want a portable folding mast. Can I enlarge it safely? And how much?
Jazz
-- John Schinnerer - M.A., Whole Systems Design
- Eco-Living - Whole Systems Design Services People - Place - Learning - Integration john@eco-living.net - 510.982.1334 http://eco-living.net http://sociocracyconsulting.com
-- John Schinnerer - M.A., Whole Systems Design -------------------------------------------- - Eco-Living - Whole Systems Design Services People - Place - Learning - Integration john@eco-living.net - 510.982.1334 http://eco-living.net http://sociocracyconsulting.com
I've seen the butyl but was thinking it was for Windows and such...grrrrr. When it leaks I'll butyl! And I'll have a looksie at the hatch, hadn't even noticed! Jazz On Feb 9, 2016 8:38 PM, "John Schinnerer" <john@eco-living.net> wrote:
Congratulations, and thanks for all the pics...I learn something from almost every one I see of a sister ship. For example:
Your hatch has only one wood stiffener, at very rear. Mine has two, splitting the hatch into thirds (front/middle/rear); and the rear edge of the hatch is cracked in the center, undoubtedly from being stood on a time too many with no reinforcing. So I'll move one of mine to the rear, or add one...
Your mainsheet is what I was thinking when you described it - essentially same as a Potter 19 or an Ensenada 20 (and probably lotsa others but those are two I've sailed with same basic mainsheet rigging). Definitely out of the way, but I'm not crazy about having the sheet always lead from one side. It's an awkward angle to mind the sheet when sitting on the same side, for me anyhow.
Wow, fancy through-deck connector! A tip for anything else you need to bed, or re-bed - ditch the nasty (and pricey) sticky white goo, use good quality butyl tape (not 'tape' like scotch or masking; comes on a roll but is a flexible bedding compound, used on boats, RVs, etc.). For example this Dicor brand stuff:
http://www.amazon.com/gp/product/B001FCB4JS?psc=1&redirect=true&ref_=oh_aui_...
Seals "forever" and never hardens and also comes off easy. Here is one good site with photos and details of how & why, this is page one of three, page two gets into more details - this guy also sells the tape he uses, see page three (I did some research and Dicor came up as a quality product so I went with that): http://www.pbase.com/mainecruising/rebedding_hardware&page=1
cheers, John S.
On 02/09/2016 07:09 PM, Jazzy wrote:
Ok, so all drilled and the through deck is in. Its loosely screwed with sealant drying for tightening tomorrow. Steaming/decklight is installed. Anchor light is installed. Tomorrow it gets wired into the switch panel. Gonna need a bigger panel I think, but for now I'll use a couple of switches I have laying around. So here's some pics. I'll try to get steaming light pic tomorrow. It got dark!
Here's the through hull... https://www.dropbox.com/s/qn29hc195uyy5x4/20160209_182415.jpg?dl=0
Here's how my mainsheet is rigged, prob not great for racing but totally out of the way for cruising... https://www.dropbox.com/s/rdwb1tvf0jdo7ry/20160209_172631.jpg?dl=0
And here's how it all exited from the mast...seems like I could have done this better, but I'm a noob and it was the best I could think of... https://www.dropbox.com/s/ohw6nliz0wnat89/20160209_152745.jpg?dl=0
And to keep things from being to dull, here's the one and only time I've been out on it! LOL https://www.dropbox.com/s/n3n46bxvd2umdio/20160118_120353.jpg?dl=0
Jazz
PS. If you guys are looking for a temp way to share pics until you all decide on something, DropBox works great. You can put dropbox on your phone and your computer and your wifes phone and your wifes computer, and it always stays up to date. If you change something in it on your phone lets say, it changes everywhere. You just have to "share" your pic with DropBox, then open it in DropBox and right click for the "share dropbox link". The link will automatically go to your clipboard, then you just paste in your email. So long as you keep your drop box, your link will work in here. NOT AFFILIATED, but a cool program! I can look at El Nino pics from any computer or phone that has dropbox :)
On Tue, Feb 9, 2016 at 4:11 PM, Thomas Buzzi <thomaspbuzzi@gmail.com> wrote:
Hi Larry,
Thanks for the suggestion of the foam peanuts since I have already run the mast wires and can't remember if I used the snap tie trick or not. Tom B
This email has been sent from a virus-free computer protected by Avast. www.avast.com <https://www.avast.com/sig-email> <#DDB4FAA8-2DD7-40BB-A1B8-4E2AA1F9FDF2>
On Tue, Feb 9, 2016 at 3:34 PM, Larry Yake <larryyake@gmail.com> wrote:
Another option to quiet the wire slapping inside the mast is to fill it
with styrofoam packing peanuts. A piece of styrofoam swim noodle makes a nice "cork" in the ends to keep them from coming out. You also get the benefit of some flotation. I did this several years ago and it has worked very well with no issues at all.
Larry Y M17 CornDog
On Tue, Feb 9, 2016 at 1:28 PM, John Schinnerer <john@eco-living.net> wrote:
Speaking of wires in mast - that you don't want to hear slapping all
night
from down in the berth, or just slapping (chafing ;-) in general - one trick is to put three or four zip-ties every few feet on the wire as
you
feed it through, angled in different directions to make a triangle or
rectangle of zip-tie ends sticking out and pressing against the inside
of
the mast and keeping the wire from slapping.
I would use the black more UV- and heat-tolerant ones - even though
inside
the mast, they will probably last longer than the plain white ones.
cheers, John S.
On 02/09/2016 07:11 AM, Thomas Buzzi wrote:
Jazz,
I drilled a 5/8 inch hole six inches up from the bottom of my mast on
the
front face to exit the wires. I then inserted a 1/2 inch rubber
grommet
(available at hardware stores) in the hole before feeding the wires
through it.. I drilled the hole on the forward side of the mast as opposed to
the
side thinking about some future accident where I dropped the mast into
the
tabernacle and possibly slice through those protruding wires.
Two things I learned about boats, you always design around chafe since nothing is still on a boat and things rub all the time and the other
is
never leave a corner anywhere that is not radiused. Those sharp
corners
in
a fall can be deadly.
Have fun. Tom B <https://www.avast.com/sig-email> This email has been sent from a virus-free computer protected by Avast. www.avast.com <https://www.avast.com/sig-email> <#DDB4FAA8-2DD7-40BB-A1B8-4E2AA1F9FDF2>
On Mon, Feb 8, 2016 at 11:41 PM, Jazzy <jazzydaze@gmail.com> wrote:
So I'm running mast wires. ..there's an exit hole that's about 1/4
inch
down near the bottom of the mast. It would be helpful if it was
> bigger
but
> I don't want a portable folding mast. Can I enlarge it safely? And > how
much?
> > Jazz > > > -- John Schinnerer - M.A., Whole Systems Design
- Eco-Living - Whole Systems Design Services People - Place - Learning - Integration john@eco-living.net - 510.982.1334 http://eco-living.net http://sociocracyconsulting.com
-- John Schinnerer - M.A., Whole Systems Design
- Eco-Living - Whole Systems Design Services People - Place - Learning - Integration john@eco-living.net - 510.982.1334 http://eco-living.net http://sociocracyconsulting.com
This is best shot I can find at the moment of my hatch - side view, slid forward - you can see the two stiffeners splitting hatch into thirds. Nothing bracing the rear edge. You can do windows with butyl I've read, depending on if there is a frame around them and how the frame beds. Somewhere I found another site with a how-to of someone re-bedding their portlights with butyl - those were flanged ports, different than the inside/outside aluminum frames on my M17 windows. Haven't looked at those yet. cheers, John S. On 02/09/2016 08:42 PM, Jazzy wrote:
I've seen the butyl but was thinking it was for Windows and such...grrrrr. When it leaks I'll butyl! And I'll have a looksie at the hatch, hadn't even noticed!
Jazz On Feb 9, 2016 8:38 PM, "John Schinnerer" <john@eco-living.net> wrote:
Congratulations, and thanks for all the pics...I learn something from almost every one I see of a sister ship. For example:
Your hatch has only one wood stiffener, at very rear. Mine has two, splitting the hatch into thirds (front/middle/rear); and the rear edge of the hatch is cracked in the center, undoubtedly from being stood on a time too many with no reinforcing. So I'll move one of mine to the rear, or add one...
Your mainsheet is what I was thinking when you described it - essentially same as a Potter 19 or an Ensenada 20 (and probably lotsa others but those are two I've sailed with same basic mainsheet rigging). Definitely out of the way, but I'm not crazy about having the sheet always lead from one side. It's an awkward angle to mind the sheet when sitting on the same side, for me anyhow.
Wow, fancy through-deck connector! A tip for anything else you need to bed, or re-bed - ditch the nasty (and pricey) sticky white goo, use good quality butyl tape (not 'tape' like scotch or masking; comes on a roll but is a flexible bedding compound, used on boats, RVs, etc.). For example this Dicor brand stuff:
http://www.amazon.com/gp/product/B001FCB4JS?psc=1&redirect=true&ref_=oh_aui_...
Seals "forever" and never hardens and also comes off easy. Here is one good site with photos and details of how & why, this is page one of three, page two gets into more details - this guy also sells the tape he uses, see page three (I did some research and Dicor came up as a quality product so I went with that): http://www.pbase.com/mainecruising/rebedding_hardware&page=1
cheers, John S.
On 02/09/2016 07:09 PM, Jazzy wrote:
Ok, so all drilled and the through deck is in. Its loosely screwed with sealant drying for tightening tomorrow. Steaming/decklight is installed. Anchor light is installed. Tomorrow it gets wired into the switch panel. Gonna need a bigger panel I think, but for now I'll use a couple of switches I have laying around. So here's some pics. I'll try to get steaming light pic tomorrow. It got dark!
Here's the through hull... https://www.dropbox.com/s/qn29hc195uyy5x4/20160209_182415.jpg?dl=0
Here's how my mainsheet is rigged, prob not great for racing but totally out of the way for cruising... https://www.dropbox.com/s/rdwb1tvf0jdo7ry/20160209_172631.jpg?dl=0
And here's how it all exited from the mast...seems like I could have done this better, but I'm a noob and it was the best I could think of... https://www.dropbox.com/s/ohw6nliz0wnat89/20160209_152745.jpg?dl=0
And to keep things from being to dull, here's the one and only time I've been out on it! LOL https://www.dropbox.com/s/n3n46bxvd2umdio/20160118_120353.jpg?dl=0
Jazz
PS. If you guys are looking for a temp way to share pics until you all decide on something, DropBox works great. You can put dropbox on your phone and your computer and your wifes phone and your wifes computer, and it always stays up to date. If you change something in it on your phone lets say, it changes everywhere. You just have to "share" your pic with DropBox, then open it in DropBox and right click for the "share dropbox link". The link will automatically go to your clipboard, then you just paste in your email. So long as you keep your drop box, your link will work in here. NOT AFFILIATED, but a cool program! I can look at El Nino pics from any computer or phone that has dropbox :)
On Tue, Feb 9, 2016 at 4:11 PM, Thomas Buzzi <thomaspbuzzi@gmail.com> wrote:
Hi Larry,
Thanks for the suggestion of the foam peanuts since I have already run the mast wires and can't remember if I used the snap tie trick or not. Tom B
This email has been sent from a virus-free computer protected by Avast. www.avast.com <https://www.avast.com/sig-email> <#DDB4FAA8-2DD7-40BB-A1B8-4E2AA1F9FDF2>
On Tue, Feb 9, 2016 at 3:34 PM, Larry Yake <larryyake@gmail.com> wrote:
Another option to quiet the wire slapping inside the mast is to fill it
with styrofoam packing peanuts. A piece of styrofoam swim noodle makes a nice "cork" in the ends to keep them from coming out. You also get the benefit of some flotation. I did this several years ago and it has worked very well with no issues at all.
Larry Y M17 CornDog
On Tue, Feb 9, 2016 at 1:28 PM, John Schinnerer <john@eco-living.net> wrote:
Speaking of wires in mast - that you don't want to hear slapping all
night
from down in the berth, or just slapping (chafing ;-) in general - one trick is to put three or four zip-ties every few feet on the wire as
you
feed it through, angled in different directions to make a triangle or
rectangle of zip-tie ends sticking out and pressing against the inside
of
the mast and keeping the wire from slapping.
I would use the black more UV- and heat-tolerant ones - even though
inside
the mast, they will probably last longer than the plain white ones.
cheers, John S.
On 02/09/2016 07:11 AM, Thomas Buzzi wrote:
Jazz, > I drilled a 5/8 inch hole six inches up from the bottom of my mast on > the
front face to exit the wires. I then inserted a 1/2 inch rubber > grommet
(available at hardware stores) in the hole before feeding the wires
> through > it.. I drilled the hole on the forward side of the mast as opposed to > the
side thinking about some future accident where I dropped the mast into > the
tabernacle and possibly slice through those protruding wires. > Two things I learned about boats, you always design around chafe since > nothing is still on a boat and things rub all the time and the other > is
never leave a corner anywhere that is not radiused. Those sharp
> corners
in
a fall can be deadly. > Have fun. > Tom B > <https://www.avast.com/sig-email> This email has been sent from a > virus-free computer protected by Avast. > www.avast.com <https://www.avast.com/sig-email> > <#DDB4FAA8-2DD7-40BB-A1B8-4E2AA1F9FDF2> > > On Mon, Feb 8, 2016 at 11:41 PM, Jazzy <jazzydaze@gmail.com> wrote: > > So I'm running mast wires. ..there's an exit hole that's about 1/4 > inch
down near the bottom of the mast. It would be helpful if it was
>> > bigger
but
>> I don't want a portable folding mast. Can I enlarge it safely? And >> > how
much? >> >> Jazz >> >> >> -- John Schinnerer - M.A., Whole Systems Design -------------------------------------------- - Eco-Living - Whole Systems Design Services People - Place - Learning - Integration john@eco-living.net - 510.982.1334 http://eco-living.net http://sociocracyconsulting.com
-- John Schinnerer - M.A., Whole Systems Design
- Eco-Living - Whole Systems Design Services People - Place - Learning - Integration john@eco-living.net - 510.982.1334 http://eco-living.net http://sociocracyconsulting.com
-- John Schinnerer - M.A., Whole Systems Design -------------------------------------------- - Eco-Living - Whole Systems Design Services People - Place - Learning - Integration john@eco-living.net - 510.982.1334 http://eco-living.net http://sociocracyconsulting.com
Ahhh I seeeee! And your shiny white sails...that's on the list too...oieeee Jazz On Feb 9, 2016 8:55 PM, "John Schinnerer" <john@eco-living.net> wrote:
This is best shot I can find at the moment of my hatch - side view, slid forward - you can see the two stiffeners splitting hatch into thirds. Nothing bracing the rear edge.
You can do windows with butyl I've read, depending on if there is a frame around them and how the frame beds. Somewhere I found another site with a how-to of someone re-bedding their portlights with butyl - those were flanged ports, different than the inside/outside aluminum frames on my M17 windows. Haven't looked at those yet.
cheers, John S.
On 02/09/2016 08:42 PM, Jazzy wrote:
I've seen the butyl but was thinking it was for Windows and such...grrrrr. When it leaks I'll butyl! And I'll have a looksie at the hatch, hadn't even noticed!
Jazz On Feb 9, 2016 8:38 PM, "John Schinnerer" <john@eco-living.net> wrote:
Congratulations, and thanks for all the pics...I learn something from
almost every one I see of a sister ship. For example:
Your hatch has only one wood stiffener, at very rear. Mine has two, splitting the hatch into thirds (front/middle/rear); and the rear edge of the hatch is cracked in the center, undoubtedly from being stood on a time too many with no reinforcing. So I'll move one of mine to the rear, or add one...
Your mainsheet is what I was thinking when you described it - essentially same as a Potter 19 or an Ensenada 20 (and probably lotsa others but those are two I've sailed with same basic mainsheet rigging). Definitely out of the way, but I'm not crazy about having the sheet always lead from one side. It's an awkward angle to mind the sheet when sitting on the same side, for me anyhow.
Wow, fancy through-deck connector! A tip for anything else you need to bed, or re-bed - ditch the nasty (and pricey) sticky white goo, use good quality butyl tape (not 'tape' like scotch or masking; comes on a roll but is a flexible bedding compound, used on boats, RVs, etc.). For example this Dicor brand stuff:
http://www.amazon.com/gp/product/B001FCB4JS?psc=1&redirect=true&ref_=oh_aui_...
Seals "forever" and never hardens and also comes off easy. Here is one good site with photos and details of how & why, this is page one of three, page two gets into more details - this guy also sells the tape he uses, see page three (I did some research and Dicor came up as a quality product so I went with that): http://www.pbase.com/mainecruising/rebedding_hardware&page=1
cheers, John S.
On 02/09/2016 07:09 PM, Jazzy wrote:
Ok, so all drilled and the through deck is in. Its loosely screwed with
sealant drying for tightening tomorrow. Steaming/decklight is installed. Anchor light is installed. Tomorrow it gets wired into the switch panel. Gonna need a bigger panel I think, but for now I'll use a couple of switches I have laying around. So here's some pics. I'll try to get steaming light pic tomorrow. It got dark!
Here's the through hull... https://www.dropbox.com/s/qn29hc195uyy5x4/20160209_182415.jpg?dl=0
Here's how my mainsheet is rigged, prob not great for racing but totally out of the way for cruising... https://www.dropbox.com/s/rdwb1tvf0jdo7ry/20160209_172631.jpg?dl=0
And here's how it all exited from the mast...seems like I could have done this better, but I'm a noob and it was the best I could think of... https://www.dropbox.com/s/ohw6nliz0wnat89/20160209_152745.jpg?dl=0
And to keep things from being to dull, here's the one and only time I've been out on it! LOL https://www.dropbox.com/s/n3n46bxvd2umdio/20160118_120353.jpg?dl=0
Jazz
PS. If you guys are looking for a temp way to share pics until you all decide on something, DropBox works great. You can put dropbox on your phone and your computer and your wifes phone and your wifes computer, and it always stays up to date. If you change something in it on your phone lets say, it changes everywhere. You just have to "share" your pic with DropBox, then open it in DropBox and right click for the "share dropbox link". The link will automatically go to your clipboard, then you just paste in your email. So long as you keep your drop box, your link will work in here. NOT AFFILIATED, but a cool program! I can look at El Nino pics from any computer or phone that has dropbox :)
On Tue, Feb 9, 2016 at 4:11 PM, Thomas Buzzi <thomaspbuzzi@gmail.com> wrote:
Hi Larry,
Thanks for the suggestion of the foam peanuts since I have already run the mast wires and can't remember if I used the snap tie trick or not. Tom B
This email has been sent from a virus-free computer protected by Avast. www.avast.com <https://www.avast.com/sig-email> <#DDB4FAA8-2DD7-40BB-A1B8-4E2AA1F9FDF2>
On Tue, Feb 9, 2016 at 3:34 PM, Larry Yake <larryyake@gmail.com> wrote:
Another option to quiet the wire slapping inside the mast is to fill it
with styrofoam packing peanuts. A piece of styrofoam swim noodle makes a nice "cork" in the ends to keep them from coming out. You also get the benefit of some flotation. I did this several years ago and it has worked very well with no issues at all.
Larry Y M17 CornDog
On Tue, Feb 9, 2016 at 1:28 PM, John Schinnerer <john@eco-living.net> wrote:
Speaking of wires in mast - that you don't want to hear slapping all
> > night
from down in the berth, or just slapping (chafing ;-) in general - one > trick is to put three or four zip-ties every few feet on the wire as > > you
feed it through, angled in different directions to make a triangle or
> rectangle of zip-tie ends sticking out and pressing against the > inside > > of
the mast and keeping the wire from slapping.
> I would use the black more UV- and heat-tolerant ones - even though > > inside
the mast, they will probably last longer than the plain white ones. > > cheers, > John S. > > > On 02/09/2016 07:11 AM, Thomas Buzzi wrote: > > Jazz, > >> I drilled a 5/8 inch hole six inches up from the bottom of my mast >> on >> >> the >
front face to exit the wires. I then inserted a 1/2 inch rubber > >> >> grommet >
(available at hardware stores) in the hole before feeding the wires
> through >> it.. I drilled the hole on the forward side of the mast as opposed >> to >> >> the >
side thinking about some future accident where I dropped the mast into > >> >> the >
tabernacle and possibly slice through those protruding wires. > >> Two things I learned about boats, you always design around chafe >> since >> nothing is still on a boat and things rub all the time and the other >> >> is >
never leave a corner anywhere that is not radiused. Those sharp
> >> corners >
in
a fall can be deadly. > >> Have fun. >> Tom B >> <https://www.avast.com/sig-email> This email has been sent from a >> virus-free computer protected by Avast. >> www.avast.com <https://www.avast.com/sig-email> >> <#DDB4FAA8-2DD7-40BB-A1B8-4E2AA1F9FDF2> >> >> On Mon, Feb 8, 2016 at 11:41 PM, Jazzy <jazzydaze@gmail.com> wrote: >> >> So I'm running mast wires. ..there's an exit hole that's about 1/4 >> >> inch >
down near the bottom of the mast. It would be helpful if it was
> >>> bigger >> >
but
> I don't want a portable folding mast. Can I enlarge it safely? And >>> >>> how >> > much? > >> >>> Jazz >>> >>> >>> -- >>> >> John Schinnerer - M.A., Whole Systems Design > -------------------------------------------- > - Eco-Living - > Whole Systems Design Services > People - Place - Learning - Integration > john@eco-living.net - 510.982.1334 > http://eco-living.net > http://sociocracyconsulting.com > > > >
-- John Schinnerer - M.A., Whole Systems Design
- Eco-Living - Whole Systems Design Services People - Place - Learning - Integration john@eco-living.net - 510.982.1334 http://eco-living.net http://sociocracyconsulting.com
-- John Schinnerer - M.A., Whole Systems Design
- Eco-Living - Whole Systems Design Services People - Place - Learning - Integration john@eco-living.net - 510.982.1334 http://eco-living.net http://sociocracyconsulting.com
One problem that you may run into with butyl tape (I did), is that since it doesn't harden, it continues to "bleed" out from around your fitting. I redid all the deck fittings on a boat a couple years ago with it, using top quality butyl by the way, and ended up having to trim the edges around the fittings several times to keep it looking clean and tidy. I eventually sold that boat, so I don't know if the problem still continues. If you don't care about the "bleed", it's great stuff. Larry Y On Tue, Feb 9, 2016 at 9:17 PM, Jazzy <jazzydaze@gmail.com> wrote:
Ahhh I seeeee! And your shiny white sails...that's on the list too...oieeee
Jazz On Feb 9, 2016 8:55 PM, "John Schinnerer" <john@eco-living.net> wrote:
This is best shot I can find at the moment of my hatch - side view, slid forward - you can see the two stiffeners splitting hatch into thirds. Nothing bracing the rear edge.
You can do windows with butyl I've read, depending on if there is a frame around them and how the frame beds. Somewhere I found another site with a how-to of someone re-bedding their portlights with butyl - those were flanged ports, different than the inside/outside aluminum frames on my M17 windows. Haven't looked at those yet.
cheers, John S.
On 02/09/2016 08:42 PM, Jazzy wrote:
I've seen the butyl but was thinking it was for Windows and such...grrrrr. When it leaks I'll butyl! And I'll have a looksie at the hatch, hadn't even noticed!
Jazz On Feb 9, 2016 8:38 PM, "John Schinnerer" <john@eco-living.net> wrote:
Congratulations, and thanks for all the pics...I learn something from
almost every one I see of a sister ship. For example:
Your hatch has only one wood stiffener, at very rear. Mine has two, splitting the hatch into thirds (front/middle/rear); and the rear edge of the hatch is cracked in the center, undoubtedly from being stood on a time too many with no reinforcing. So I'll move one of mine to the rear, or add one...
Your mainsheet is what I was thinking when you described it - essentially same as a Potter 19 or an Ensenada 20 (and probably lotsa others but those are two I've sailed with same basic mainsheet rigging). Definitely out of the way, but I'm not crazy about having the sheet always lead from one side. It's an awkward angle to mind the sheet when sitting on the same side, for me anyhow.
Wow, fancy through-deck connector! A tip for anything else you need to bed, or re-bed - ditch the nasty (and pricey) sticky white goo, use good quality butyl tape (not 'tape' like scotch or masking; comes on a roll but is a flexible bedding compound, used on boats, RVs, etc.). For example this Dicor brand stuff:
http://www.amazon.com/gp/product/B001FCB4JS?psc=1&redirect=true&ref_=oh_aui_...
Seals "forever" and never hardens and also comes off easy. Here is one good site with photos and details of how & why, this is
page
one of three, page two gets into more details - this guy also sells the tape he uses, see page three (I did some research and Dicor came up as a quality product so I went with that): http://www.pbase.com/mainecruising/rebedding_hardware&page=1
cheers, John S.
On 02/09/2016 07:09 PM, Jazzy wrote:
Ok, so all drilled and the through deck is in. Its loosely screwed with
sealant drying for tightening tomorrow. Steaming/decklight is installed. Anchor light is installed. Tomorrow it gets wired into the switch panel. Gonna need a bigger panel I think, but for now I'll use a couple of switches I have laying around. So here's some pics. I'll try to get steaming light pic tomorrow. It got dark!
Here's the through hull... https://www.dropbox.com/s/qn29hc195uyy5x4/20160209_182415.jpg?dl=0
Here's how my mainsheet is rigged, prob not great for racing but totally out of the way for cruising... https://www.dropbox.com/s/rdwb1tvf0jdo7ry/20160209_172631.jpg?dl=0
And here's how it all exited from the mast...seems like I could have done this better, but I'm a noob and it was the best I could think of... https://www.dropbox.com/s/ohw6nliz0wnat89/20160209_152745.jpg?dl=0
And to keep things from being to dull, here's the one and only time I've been out on it! LOL https://www.dropbox.com/s/n3n46bxvd2umdio/20160118_120353.jpg?dl=0
Jazz
PS. If you guys are looking for a temp way to share pics until you all decide on something, DropBox works great. You can put dropbox on your phone and your computer and your wifes phone and your wifes computer, and it always stays up to date. If you change something in it on your phone lets say, it changes everywhere. You just have to "share" your pic with DropBox, then open it in DropBox and right click for the "share dropbox link". The link will automatically go to your clipboard, then you just paste in your email. So long as you keep your drop box, your link will work in here. NOT AFFILIATED, but a cool program! I can look at El Nino pics from any computer or phone that has dropbox :)
On Tue, Feb 9, 2016 at 4:11 PM, Thomas Buzzi <thomaspbuzzi@gmail.com> wrote:
Hi Larry,
Thanks for the suggestion of the foam peanuts since I have already run the mast wires and can't remember if I used the snap tie trick or not. Tom B
This email has been sent from a virus-free computer protected by Avast. www.avast.com <https://www.avast.com/sig-email> <#DDB4FAA8-2DD7-40BB-A1B8-4E2AA1F9FDF2>
On Tue, Feb 9, 2016 at 3:34 PM, Larry Yake <larryyake@gmail.com> wrote:
Another option to quiet the wire slapping inside the mast is to fill it
> with styrofoam packing peanuts. A piece of styrofoam swim noodle > makes a > nice "cork" in the ends to keep them from coming out. You also get the > benefit of some flotation. I did this several years ago and it has > worked > very well with no issues at all. > > Larry Y > M17 CornDog > > On Tue, Feb 9, 2016 at 1:28 PM, John Schinnerer < john@eco-living.net> > wrote: > > Speaking of wires in mast - that you don't want to hear slapping all > >> >> night > > from down in the berth, or just slapping (chafing ;-) in general - one >> trick is to put three or four zip-ties every few feet on the wire as >> >> you >
feed it through, angled in different directions to make a triangle or > >> rectangle of zip-tie ends sticking out and pressing against the >> inside >> >> of >
the mast and keeping the wire from slapping. > >> I would use the black more UV- and heat-tolerant ones - even though >> >> inside > > the mast, they will probably last longer than the plain white ones. >> >> cheers, >> John S. >> >> >> On 02/09/2016 07:11 AM, Thomas Buzzi wrote: >> >> Jazz, >> >>> I drilled a 5/8 inch hole six inches up from the bottom of my mast >>> on >>> >>> the >> > > front face to exit the wires. I then inserted a 1/2 inch rubber >> >>> >>> grommet >> > (available at hardware stores) in the hole before feeding the wires > >> through >>> it.. I drilled the hole on the forward side of the mast as opposed >>> to >>> >>> the >> > > side thinking about some future accident where I dropped the mast into >> >>> >>> the >> > > tabernacle and possibly slice through those protruding wires. >> >>> Two things I learned about boats, you always design around chafe >>> since >>> nothing is still on a boat and things rub all the time and the other >>> >>> is >> > never leave a corner anywhere that is not radiused. Those sharp > >> >>> corners >> > in > > a fall can be deadly. >> >>> Have fun. >>> Tom B >>> <https://www.avast.com/sig-email> This email has been sent from a >>> virus-free computer protected by Avast. >>> www.avast.com <https://www.avast.com/sig-email> >>> <#DDB4FAA8-2DD7-40BB-A1B8-4E2AA1F9FDF2> >>> >>> On Mon, Feb 8, 2016 at 11:41 PM, Jazzy <jazzydaze@gmail.com> wrote: >>> >>> So I'm running mast wires. ..there's an exit hole that's about 1/4 >>> >>> inch >> > down near the bottom of the mast. It would be helpful if it was > >> >>>> bigger >>> >> but > >> I don't want a portable folding mast. Can I enlarge it safely? And >>>> >>>> how >>> >> > much? >> >>> >>>> Jazz >>>> >>>> >>>> -- >>>> >>> John Schinnerer - M.A., Whole Systems Design >> -------------------------------------------- >> - Eco-Living - >> Whole Systems Design Services >> People - Place - Learning - Integration >> john@eco-living.net - 510.982.1334 >> http://eco-living.net >> http://sociocracyconsulting.com >> >> >> >> > -- John Schinnerer - M.A., Whole Systems Design
- Eco-Living - Whole Systems Design Services People - Place - Learning - Integration john@eco-living.net - 510.982.1334 http://eco-living.net http://sociocracyconsulting.com
-- John Schinnerer - M.A., Whole Systems Design
- Eco-Living - Whole Systems Design Services People - Place - Learning - Integration john@eco-living.net - 510.982.1334 http://eco-living.net http://sociocracyconsulting.com
It will squeeze out, yes - the link I posted, he explains that it will ooze as you finish the tightening. It does stop once the piece is as snug as can get and all that's there to squeeze out squeezes out (the rest is still there doing the sealing). For me, a way better "mess" to clean up than 4200 or 5200 or anything similar. It's so much easier to work with, no need to mask anything, way cheaper, etc. - having seen people wrestle with 4200/5200 on club boats I thought "there must be a better way" and a few years later heard about the butyl. As the link describes, it was used by most quality builders into the 70's but was dropped as economics got tighter due to being more labor intensive, even if a better long-term method. cheers, John S. On 02/09/2016 09:27 PM, Larry Yake wrote:
One problem that you may run into with butyl tape (I did), is that since it doesn't harden, it continues to "bleed" out from around your fitting. I redid all the deck fittings on a boat a couple years ago with it, using top quality butyl by the way, and ended up having to trim the edges around the fittings several times to keep it looking clean and tidy. I eventually sold that boat, so I don't know if the problem still continues. If you don't care about the "bleed", it's great stuff.
Larry Y
On Tue, Feb 9, 2016 at 9:17 PM, Jazzy <jazzydaze@gmail.com> wrote:
Ahhh I seeeee! And your shiny white sails...that's on the list too...oieeee
Jazz On Feb 9, 2016 8:55 PM, "John Schinnerer" <john@eco-living.net> wrote:
This is best shot I can find at the moment of my hatch - side view, slid forward - you can see the two stiffeners splitting hatch into thirds. Nothing bracing the rear edge.
You can do windows with butyl I've read, depending on if there is a frame around them and how the frame beds. Somewhere I found another site with a how-to of someone re-bedding their portlights with butyl - those were flanged ports, different than the inside/outside aluminum frames on my M17 windows. Haven't looked at those yet.
cheers, John S.
On 02/09/2016 08:42 PM, Jazzy wrote:
I've seen the butyl but was thinking it was for Windows and such...grrrrr. When it leaks I'll butyl! And I'll have a looksie at the hatch, hadn't even noticed!
Jazz On Feb 9, 2016 8:38 PM, "John Schinnerer" <john@eco-living.net> wrote:
Congratulations, and thanks for all the pics...I learn something from
almost every one I see of a sister ship. For example:
Your hatch has only one wood stiffener, at very rear. Mine has two, splitting the hatch into thirds (front/middle/rear); and the rear edge of the hatch is cracked in the center, undoubtedly from being stood on a time too many with no reinforcing. So I'll move one of mine to the rear, or add one...
Your mainsheet is what I was thinking when you described it - essentially same as a Potter 19 or an Ensenada 20 (and probably lotsa others but those are two I've sailed with same basic mainsheet rigging). Definitely out of the way, but I'm not crazy about having the sheet always lead from one side. It's an awkward angle to mind the sheet when sitting on the same side, for me anyhow.
Wow, fancy through-deck connector! A tip for anything else you need to bed, or re-bed - ditch the nasty (and pricey) sticky white goo, use good quality butyl tape (not 'tape' like scotch or masking; comes on a roll but is a flexible bedding compound, used on boats, RVs, etc.). For example this Dicor brand stuff:
http://www.amazon.com/gp/product/B001FCB4JS?psc=1&redirect=true&ref_=oh_aui_...
Seals "forever" and never hardens and also comes off easy. Here is one good site with photos and details of how & why, this is
page
one of three, page two gets into more details - this guy also sells the tape he uses, see page three (I did some research and Dicor came up as a quality product so I went with that): http://www.pbase.com/mainecruising/rebedding_hardware&page=1
cheers, John S.
On 02/09/2016 07:09 PM, Jazzy wrote:
Ok, so all drilled and the through deck is in. Its loosely screwed with
sealant drying for tightening tomorrow. Steaming/decklight is installed. Anchor light is installed. Tomorrow it gets wired into the switch panel. Gonna need a bigger panel I think, but for now I'll use a couple of switches I have laying around. So here's some pics. I'll try to get steaming light pic tomorrow. It got dark!
Here's the through hull... https://www.dropbox.com/s/qn29hc195uyy5x4/20160209_182415.jpg?dl=0
Here's how my mainsheet is rigged, prob not great for racing but totally out of the way for cruising... https://www.dropbox.com/s/rdwb1tvf0jdo7ry/20160209_172631.jpg?dl=0
And here's how it all exited from the mast...seems like I could have done this better, but I'm a noob and it was the best I could think of... https://www.dropbox.com/s/ohw6nliz0wnat89/20160209_152745.jpg?dl=0
And to keep things from being to dull, here's the one and only time I've been out on it! LOL https://www.dropbox.com/s/n3n46bxvd2umdio/20160118_120353.jpg?dl=0
Jazz
PS. If you guys are looking for a temp way to share pics until you all decide on something, DropBox works great. You can put dropbox on your phone and your computer and your wifes phone and your wifes computer, and it always stays up to date. If you change something in it on your phone lets say, it changes everywhere. You just have to "share" your pic with DropBox, then open it in DropBox and right click for the "share dropbox link". The link will automatically go to your clipboard, then you just paste in your email. So long as you keep your drop box, your link will work in here. NOT AFFILIATED, but a cool program! I can look at El Nino pics from any computer or phone that has dropbox :)
On Tue, Feb 9, 2016 at 4:11 PM, Thomas Buzzi <thomaspbuzzi@gmail.com> wrote:
Hi Larry,
> Thanks for the suggestion of the foam peanuts since I have already run > the > mast wires and can't remember if I used the snap tie trick or not. > Tom B > > This email has been sent from a virus-free computer protected by Avast. > www.avast.com <https://www.avast.com/sig-email> > <#DDB4FAA8-2DD7-40BB-A1B8-4E2AA1F9FDF2> > > On Tue, Feb 9, 2016 at 3:34 PM, Larry Yake <larryyake@gmail.com> > wrote: > > Another option to quiet the wire slapping inside the mast is to fill it > >> with styrofoam packing peanuts. A piece of styrofoam swim noodle >> makes a >> nice "cork" in the ends to keep them from coming out. You also get the >> benefit of some flotation. I did this several years ago and it has >> worked >> very well with no issues at all. >> >> Larry Y >> M17 CornDog >> >> On Tue, Feb 9, 2016 at 1:28 PM, John Schinnerer < john@eco-living.net> >> wrote: >> >> Speaking of wires in mast - that you don't want to hear slapping all >> >>> >>> night >> >> from down in the berth, or just slapping (chafing ;-) in general - one >>> trick is to put three or four zip-ties every few feet on the wire as >>> >>> you >> > > feed it through, angled in different directions to make a triangle or >> >>> rectangle of zip-tie ends sticking out and pressing against the >>> inside >>> >>> of >> > > the mast and keeping the wire from slapping. >> >>> I would use the black more UV- and heat-tolerant ones - even though >>> >>> inside >> >> the mast, they will probably last longer than the plain white ones. >>> >>> cheers, >>> John S. >>> >>> >>> On 02/09/2016 07:11 AM, Thomas Buzzi wrote: >>> >>> Jazz, >>> >>>> I drilled a 5/8 inch hole six inches up from the bottom of my mast >>>> on >>>> >>>> the >>> >> >> front face to exit the wires. I then inserted a 1/2 inch rubber >>> >>>> >>>> grommet >>> >> > (available at hardware stores) in the hole before feeding the wires >> >>> through >>>> it.. I drilled the hole on the forward side of the mast as opposed >>>> to >>>> >>>> the >>> >> >> side thinking about some future accident where I dropped the mast into >>> >>>> >>>> the >>> >> >> tabernacle and possibly slice through those protruding wires. >>> >>>> Two things I learned about boats, you always design around chafe >>>> since >>>> nothing is still on a boat and things rub all the time and the other >>>> >>>> is >>> >> > never leave a corner anywhere that is not radiused. Those sharp >> >>> >>>> corners >>> >> > in >> >> a fall can be deadly. >>> >>>> Have fun. >>>> Tom B >>>> <https://www.avast.com/sig-email> This email has been sent from a >>>> virus-free computer protected by Avast. >>>> www.avast.com <https://www.avast.com/sig-email> >>>> <#DDB4FAA8-2DD7-40BB-A1B8-4E2AA1F9FDF2> >>>> >>>> On Mon, Feb 8, 2016 at 11:41 PM, Jazzy <jazzydaze@gmail.com> wrote: >>>> >>>> So I'm running mast wires. ..there's an exit hole that's about 1/4 >>>> >>>> inch >>> >> > down near the bottom of the mast. It would be helpful if it was >> >>> >>>>> bigger >>>> >>> > but >> >>> I don't want a portable folding mast. Can I enlarge it safely? And >>>>> >>>>> how >>>> >>> >> much? >>> >>>> >>>>> Jazz >>>>> >>>>> >>>>> -- >>>>> >>>> John Schinnerer - M.A., Whole Systems Design >>> -------------------------------------------- >>> - Eco-Living - >>> Whole Systems Design Services >>> People - Place - Learning - Integration >>> john@eco-living.net - 510.982.1334 >>> http://eco-living.net >>> http://sociocracyconsulting.com >>> >>> >>> >>> >> > -- John Schinnerer - M.A., Whole Systems Design
- Eco-Living - Whole Systems Design Services People - Place - Learning - Integration john@eco-living.net - 510.982.1334 http://eco-living.net http://sociocracyconsulting.com
-- John Schinnerer - M.A., Whole Systems Design
- Eco-Living - Whole Systems Design Services People - Place - Learning - Integration john@eco-living.net - 510.982.1334 http://eco-living.net http://sociocracyconsulting.com
-- John Schinnerer - M.A., Whole Systems Design -------------------------------------------- - Eco-Living - Whole Systems Design Services People - Place - Learning - Integration john@eco-living.net - 510.982.1334 http://eco-living.net http://sociocracyconsulting.com
Good article. Sounds like I just didn't use the correct method of tightening it slowly over several days. One area where I would still avoid using it though, is where you can't really cinch the bolts down tight for fear of crushing the surface. He does recommend large backing plates to overcome that, but in some situations that's not possible or desirable. On Tue, Feb 9, 2016 at 9:36 PM, John Schinnerer <john@eco-living.net> wrote:
It will squeeze out, yes - the link I posted, he explains that it will ooze as you finish the tightening. It does stop once the piece is as snug as can get and all that's there to squeeze out squeezes out (the rest is still there doing the sealing). For me, a way better "mess" to clean up than 4200 or 5200 or anything similar. It's so much easier to work with, no need to mask anything, way cheaper, etc. - having seen people wrestle with 4200/5200 on club boats I thought "there must be a better way" and a few years later heard about the butyl. As the link describes, it was used by most quality builders into the 70's but was dropped as economics got tighter due to being more labor intensive, even if a better long-term method.
cheers, John S.
On 02/09/2016 09:27 PM, Larry Yake wrote:
One problem that you may run into with butyl tape (I did), is that since it doesn't harden, it continues to "bleed" out from around your fitting. I redid all the deck fittings on a boat a couple years ago with it, using top quality butyl by the way, and ended up having to trim the edges around the fittings several times to keep it looking clean and tidy. I eventually sold that boat, so I don't know if the problem still continues. If you don't care about the "bleed", it's great stuff.
Larry Y
On Tue, Feb 9, 2016 at 9:17 PM, Jazzy <jazzydaze@gmail.com> wrote:
Ahhh I seeeee! And your shiny white sails...that's on the list
too...oieeee
Jazz On Feb 9, 2016 8:55 PM, "John Schinnerer" <john@eco-living.net> wrote:
This is best shot I can find at the moment of my hatch - side view, slid
forward - you can see the two stiffeners splitting hatch into thirds. Nothing bracing the rear edge.
You can do windows with butyl I've read, depending on if there is a frame around them and how the frame beds. Somewhere I found another site with a how-to of someone re-bedding their portlights with butyl - those were flanged ports, different than the inside/outside aluminum frames on my
M17
windows. Haven't looked at those yet.
cheers, John S.
On 02/09/2016 08:42 PM, Jazzy wrote:
I've seen the butyl but was thinking it was for Windows and
such...grrrrr.
When it leaks I'll butyl! And I'll have a looksie at the hatch, hadn't
even noticed!
Jazz On Feb 9, 2016 8:38 PM, "John Schinnerer" <john@eco-living.net> wrote:
Congratulations, and thanks for all the pics...I learn something from
almost every one I see of a sister ship. For example:
Your hatch has only one wood stiffener, at very rear. Mine has two, splitting the hatch into thirds (front/middle/rear); and the rear edge
of
the hatch is cracked in the center, undoubtedly from being stood on a
time too many with no reinforcing. So I'll move one of mine to the rear, or add one...
Your mainsheet is what I was thinking when you described it -
essentially
same as a Potter 19 or an Ensenada 20 (and probably lotsa others but
those are two I've sailed with same basic mainsheet rigging). Definitely out
of
the way, but I'm not crazy about having the sheet always lead from one
side. It's an awkward angle to mind the sheet when sitting on the same side, for me anyhow.
Wow, fancy through-deck connector! A tip for anything else you need to bed, or re-bed - ditch the nasty
(and
pricey) sticky white goo, use good quality butyl tape (not 'tape' like
scotch or masking; comes on a roll but is a flexible bedding compound, used on boats, RVs, etc.). For example this Dicor brand stuff:
http://www.amazon.com/gp/product/B001FCB4JS?psc=1&redirect=true&ref_=oh_aui_...
Seals "forever" and never hardens and also comes off easy. Here is one good site with photos and details of how & why, this is
page
one of three, page two gets into more details - this guy also sells the
tape he uses, see page three (I did some research and Dicor came up as
a
quality product so I went with that):
http://www.pbase.com/mainecruising/rebedding_hardware&page=1
cheers, John S.
On 02/09/2016 07:09 PM, Jazzy wrote:
Ok, so all drilled and the through deck is in. Its loosely screwed
with
sealant drying for tightening tomorrow. Steaming/decklight is
> installed. > Anchor light is installed. Tomorrow it gets wired into the switch > panel. > Gonna need a bigger panel I think, but for now I'll use a couple of > switches I have laying around. So here's some pics. I'll try to get > steaming light pic tomorrow. It got dark! > > Here's the through hull... > https://www.dropbox.com/s/qn29hc195uyy5x4/20160209_182415.jpg?dl=0 > > Here's how my mainsheet is rigged, prob not great for racing but > totally
out of the way for cruising...
> https://www.dropbox.com/s/rdwb1tvf0jdo7ry/20160209_172631.jpg?dl=0 > > And here's how it all exited from the mast...seems like I could have > done > this better, but I'm a noob and it was the best I could think of... > https://www.dropbox.com/s/ohw6nliz0wnat89/20160209_152745.jpg?dl=0 > > And to keep things from being to dull, here's the one and only time > I've
been out on it! LOL
> https://www.dropbox.com/s/n3n46bxvd2umdio/20160118_120353.jpg?dl=0 > > > Jazz > > PS. If you guys are looking for a temp way to share pics until you > all
decide on something, DropBox works great. You can put dropbox on your
> phone and your computer and your wifes phone and your wifes computer, > and > it always stays up to date. If you change something in it on your > phone
lets say, it changes everywhere. You just have to "share" your pic
> with
DropBox, then open it in DropBox and right click for the "share
> dropbox
link". The link will automatically go to your clipboard, then you
> just > paste in your email. So long as you keep your drop box, your link > will
work in here. NOT AFFILIATED, but a cool program! I can look at El
> Nino > pics from any computer or phone that has dropbox :) > > > > > > > > > > On Tue, Feb 9, 2016 at 4:11 PM, Thomas Buzzi <thomaspbuzzi@gmail.com > > > wrote: > > Hi Larry, > > Thanks for the suggestion of the foam peanuts since I have already >> > run
the
>> mast wires and can't remember if I used the snap tie trick or not. >> Tom B >> >> This email has been sent from a virus-free computer protected by >> > Avast.
www.avast.com <https://www.avast.com/sig-email>
>> <#DDB4FAA8-2DD7-40BB-A1B8-4E2AA1F9FDF2> >> >> On Tue, Feb 9, 2016 at 3:34 PM, Larry Yake <larryyake@gmail.com> >> wrote: >> >> Another option to quiet the wire slapping inside the mast is to fill >> > it
>> with styrofoam packing peanuts. A piece of styrofoam swim noodle >>> makes a >>> nice "cork" in the ends to keep them from coming out. You also get >>> >> the
benefit of some flotation. I did this several years ago and it has
>>> worked >>> very well with no issues at all. >>> >>> Larry Y >>> M17 CornDog >>> >>> On Tue, Feb 9, 2016 at 1:28 PM, John Schinnerer < >>> >> john@eco-living.net>
wrote:
>>> >>> Speaking of wires in mast - that you don't want to hear slapping >>> all >>> >>> >>>> night >>>> >>> >>> from down in the berth, or just slapping (chafing ;-) in general - >>> >> one
trick is to put three or four zip-ties every few feet on the wire
>>>> >>> as
>>>> you >>>> >>> >>> >> feed it through, angled in different directions to make a triangle >> or >> >>> >>> rectangle of zip-tie ends sticking out and pressing against the >>>> inside >>>> >>>> of >>>> >>> >>> >> the mast and keeping the wire from slapping. >> >>> >>> I would use the black more UV- and heat-tolerant ones - even though >>>> >>>> inside >>>> >>> >>> the mast, they will probably last longer than the plain white ones. >>> >>>> >>>> cheers, >>>> John S. >>>> >>>> >>>> On 02/09/2016 07:11 AM, Thomas Buzzi wrote: >>>> >>>> Jazz, >>>> >>>> I drilled a 5/8 inch hole six inches up from the bottom of my mast >>>>> on >>>>> >>>>> the >>>>> >>>> >>>> >>> front face to exit the wires. I then inserted a 1/2 inch rubber >>> >>>> >>>> >>>>> grommet >>>>> >>>> >>>> >>> (available at hardware stores) in the hole before feeding the wires >> >>> >>> through >>>> >>>>> it.. I drilled the hole on the forward side of the mast as >>>>> opposed >>>>> to >>>>> >>>>> the >>>>> >>>> >>>> >>> side thinking about some future accident where I dropped the mast >>> >> into
>>>> >>>>> the >>>>> >>>> >>>> >>> tabernacle and possibly slice through those protruding wires. >>> >>>> >>>> Two things I learned about boats, you always design around chafe >>>>> since >>>>> nothing is still on a boat and things rub all the time and the >>>>> >>>> other
>>>>> is >>>>> >>>> >>>> >>> never leave a corner anywhere that is not radiused. Those sharp >> >>> >>> >>>> corners >>>>> >>>> >>>> >>> in >> >>> >>> a fall can be deadly. >>> >>>> >>>> Have fun. >>>>> Tom B >>>>> <https://www.avast.com/sig-email> This email has been sent from >>>>> a >>>>> virus-free computer protected by Avast. >>>>> www.avast.com <https://www.avast.com/sig-email> >>>>> <#DDB4FAA8-2DD7-40BB-A1B8-4E2AA1F9FDF2> >>>>> >>>>> On Mon, Feb 8, 2016 at 11:41 PM, Jazzy <jazzydaze@gmail.com> >>>>> >>>> wrote:
>>>>> So I'm running mast wires. ..there's an exit hole that's about >>>>> 1/4 >>>>> >>>>> inch >>>>> >>>> >>>> >>> down near the bottom of the mast. It would be helpful if it was >> >>> >>> >>>> bigger >>>>>> >>>>> >>>>> >>>> but >> >>> >>> I don't want a portable folding mast. Can I enlarge it safely? >>>> >>> And
>>>>>> how >>>>>> >>>>> >>>>> >>>> much? >>> >>>> >>>> >>>>> Jazz >>>>>> >>>>>> >>>>>> -- >>>>>> >>>>>> John Schinnerer - M.A., Whole Systems Design >>>>> >>>> -------------------------------------------- >>>> - Eco-Living - >>>> Whole Systems Design Services >>>> People - Place - Learning - Integration >>>> john@eco-living.net - 510.982.1334 >>>> http://eco-living.net >>>> http://sociocracyconsulting.com >>>> >>>> >>>> >>>> >>>> >>> -- >> > John Schinnerer - M.A., Whole Systems Design -------------------------------------------- - Eco-Living - Whole Systems Design Services People - Place - Learning - Integration john@eco-living.net - 510.982.1334 http://eco-living.net http://sociocracyconsulting.com
-- John Schinnerer - M.A., Whole Systems Design
- Eco-Living - Whole Systems Design Services People - Place - Learning - Integration john@eco-living.net - 510.982.1334 http://eco-living.net http://sociocracyconsulting.com
-- John Schinnerer - M.A., Whole Systems Design
- Eco-Living - Whole Systems Design Services People - Place - Learning - Integration john@eco-living.net - 510.982.1334 http://eco-living.net http://sociocracyconsulting.com
As far as I know, it seals at whatever tightness the part gets tightened to. There would just be more of it left filling the gaps, less squeezed out, when bedding something less tight. So far I've just used it for re-bedding some cabin top cam cleats, which need to be tightened "enough but not too much," and it worked fine. cheers, John S. On 02/09/2016 10:02 PM, Larry Yake wrote:
Good article. Sounds like I just didn't use the correct method of tightening it slowly over several days. One area where I would still avoid using it though, is where you can't really cinch the bolts down tight for fear of crushing the surface. He does recommend large backing plates to overcome that, but in some situations that's not possible or desirable.
On Tue, Feb 9, 2016 at 9:36 PM, John Schinnerer <john@eco-living.net> wrote:
It will squeeze out, yes - the link I posted, he explains that it will ooze as you finish the tightening. It does stop once the piece is as snug as can get and all that's there to squeeze out squeezes out (the rest is still there doing the sealing). For me, a way better "mess" to clean up than 4200 or 5200 or anything similar. It's so much easier to work with, no need to mask anything, way cheaper, etc. - having seen people wrestle with 4200/5200 on club boats I thought "there must be a better way" and a few years later heard about the butyl. As the link describes, it was used by most quality builders into the 70's but was dropped as economics got tighter due to being more labor intensive, even if a better long-term method.
cheers, John S.
On 02/09/2016 09:27 PM, Larry Yake wrote:
One problem that you may run into with butyl tape (I did), is that since it doesn't harden, it continues to "bleed" out from around your fitting. I redid all the deck fittings on a boat a couple years ago with it, using top quality butyl by the way, and ended up having to trim the edges around the fittings several times to keep it looking clean and tidy. I eventually sold that boat, so I don't know if the problem still continues. If you don't care about the "bleed", it's great stuff.
Larry Y
On Tue, Feb 9, 2016 at 9:17 PM, Jazzy <jazzydaze@gmail.com> wrote:
Ahhh I seeeee! And your shiny white sails...that's on the list
too...oieeee
Jazz On Feb 9, 2016 8:55 PM, "John Schinnerer" <john@eco-living.net> wrote:
This is best shot I can find at the moment of my hatch - side view, slid
forward - you can see the two stiffeners splitting hatch into thirds. Nothing bracing the rear edge.
You can do windows with butyl I've read, depending on if there is a frame around them and how the frame beds. Somewhere I found another site with a how-to of someone re-bedding their portlights with butyl - those were flanged ports, different than the inside/outside aluminum frames on my
M17
windows. Haven't looked at those yet.
cheers, John S.
On 02/09/2016 08:42 PM, Jazzy wrote:
I've seen the butyl but was thinking it was for Windows and
such...grrrrr.
When it leaks I'll butyl! And I'll have a looksie at the hatch, hadn't
even noticed!
Jazz On Feb 9, 2016 8:38 PM, "John Schinnerer" <john@eco-living.net> wrote:
Congratulations, and thanks for all the pics...I learn something from
> almost every one I see of a sister ship. For example: > > Your hatch has only one wood stiffener, at very rear. Mine has two, > splitting the hatch into thirds (front/middle/rear); and the rear edge > of
the hatch is cracked in the center, undoubtedly from being stood on a
> time > too many with no reinforcing. So I'll move one of mine to the rear, or > add > one... > > Your mainsheet is what I was thinking when you described it - > essentially
same as a Potter 19 or an Ensenada 20 (and probably lotsa others but
> those > are two I've sailed with same basic mainsheet rigging). Definitely out > of
the way, but I'm not crazy about having the sheet always lead from one
> side. It's an awkward angle to mind the sheet when sitting on the same > side, for me anyhow. > > Wow, fancy through-deck connector! > A tip for anything else you need to bed, or re-bed - ditch the nasty > (and
pricey) sticky white goo, use good quality butyl tape (not 'tape' like
> scotch or masking; comes on a roll but is a flexible bedding compound, > used > on boats, RVs, etc.). For example this Dicor brand stuff: > > > > http://www.amazon.com/gp/product/B001FCB4JS?psc=1&redirect=true&ref_=oh_aui_...
> Seals "forever" and never hardens and also comes off easy. > Here is one good site with photos and details of how & why, this is > page
one of three, page two gets into more details - this guy also sells the
> tape he uses, see page three (I did some research and Dicor came up as > a
quality product so I went with that):
> http://www.pbase.com/mainecruising/rebedding_hardware&page=1 > > cheers, > John S. > > On 02/09/2016 07:09 PM, Jazzy wrote: > > Ok, so all drilled and the through deck is in. Its loosely screwed > with
sealant drying for tightening tomorrow. Steaming/decklight is
>> installed. >> Anchor light is installed. Tomorrow it gets wired into the switch >> panel. >> Gonna need a bigger panel I think, but for now I'll use a couple of >> switches I have laying around. So here's some pics. I'll try to get >> steaming light pic tomorrow. It got dark! >> >> Here's the through hull... >> https://www.dropbox.com/s/qn29hc195uyy5x4/20160209_182415.jpg?dl=0 >> >> Here's how my mainsheet is rigged, prob not great for racing but >> > totally
out of the way for cruising...
>> https://www.dropbox.com/s/rdwb1tvf0jdo7ry/20160209_172631.jpg?dl=0 >> >> And here's how it all exited from the mast...seems like I could have >> done >> this better, but I'm a noob and it was the best I could think of... >> https://www.dropbox.com/s/ohw6nliz0wnat89/20160209_152745.jpg?dl=0 >> >> And to keep things from being to dull, here's the one and only time >> > I've
been out on it! LOL
>> https://www.dropbox.com/s/n3n46bxvd2umdio/20160118_120353.jpg?dl=0 >> >> >> Jazz >> >> PS. If you guys are looking for a temp way to share pics until you >> > all
decide on something, DropBox works great. You can put dropbox on your
>> phone and your computer and your wifes phone and your wifes computer, >> and >> it always stays up to date. If you change something in it on your >> > phone
lets say, it changes everywhere. You just have to "share" your pic
>> > with
DropBox, then open it in DropBox and right click for the "share
>> > dropbox
link". The link will automatically go to your clipboard, then you
>> just >> paste in your email. So long as you keep your drop box, your link >> > will
work in here. NOT AFFILIATED, but a cool program! I can look at El
>> Nino >> pics from any computer or phone that has dropbox :) >> >> >> >> >> >> >> >> >> >> On Tue, Feb 9, 2016 at 4:11 PM, Thomas Buzzi <thomaspbuzzi@gmail.com >>> >> wrote: >> >> Hi Larry, >> >> Thanks for the suggestion of the foam peanuts since I have already >>> >> run
the
>>> mast wires and can't remember if I used the snap tie trick or not. >>> Tom B >>> >>> This email has been sent from a virus-free computer protected by >>> >> Avast.
www.avast.com <https://www.avast.com/sig-email>
>>> <#DDB4FAA8-2DD7-40BB-A1B8-4E2AA1F9FDF2> >>> >>> On Tue, Feb 9, 2016 at 3:34 PM, Larry Yake <larryyake@gmail.com> >>> wrote: >>> >>> Another option to quiet the wire slapping inside the mast is to fill >>> >> it
>>> with styrofoam packing peanuts. A piece of styrofoam swim noodle >>>> makes a >>>> nice "cork" in the ends to keep them from coming out. You also get >>>> >>> the
benefit of some flotation. I did this several years ago and it has
>>>> worked >>>> very well with no issues at all. >>>> >>>> Larry Y >>>> M17 CornDog >>>> >>>> On Tue, Feb 9, 2016 at 1:28 PM, John Schinnerer < >>>> >>> john@eco-living.net>
wrote:
>>>> >>>> Speaking of wires in mast - that you don't want to hear slapping >>>> all >>>> >>>> >>>>> night >>>>> >>>> >>>> from down in the berth, or just slapping (chafing ;-) in general - >>>> >>> one
trick is to put three or four zip-ties every few feet on the wire
>>>>> >>>> as
>>>>> you >>>>> >>>> >>>> >>> feed it through, angled in different directions to make a triangle >>> or >>> >>>> >>>> rectangle of zip-tie ends sticking out and pressing against the >>>>> inside >>>>> >>>>> of >>>>> >>>> >>>> >>> the mast and keeping the wire from slapping. >>> >>>> >>>> I would use the black more UV- and heat-tolerant ones - even though >>>>> >>>>> inside >>>>> >>>> >>>> the mast, they will probably last longer than the plain white ones. >>>> >>>>> >>>>> cheers, >>>>> John S. >>>>> >>>>> >>>>> On 02/09/2016 07:11 AM, Thomas Buzzi wrote: >>>>> >>>>> Jazz, >>>>> >>>>> I drilled a 5/8 inch hole six inches up from the bottom of my mast >>>>>> on >>>>>> >>>>>> the >>>>>> >>>>> >>>>> >>>> front face to exit the wires. I then inserted a 1/2 inch rubber >>>> >>>>> >>>>> >>>>>> grommet >>>>>> >>>>> >>>>> >>>> (available at hardware stores) in the hole before feeding the wires >>> >>>> >>>> through >>>>> >>>>>> it.. I drilled the hole on the forward side of the mast as >>>>>> opposed >>>>>> to >>>>>> >>>>>> the >>>>>> >>>>> >>>>> >>>> side thinking about some future accident where I dropped the mast >>>> >>> into
>>>>> >>>>>> the >>>>>> >>>>> >>>>> >>>> tabernacle and possibly slice through those protruding wires. >>>> >>>>> >>>>> Two things I learned about boats, you always design around chafe >>>>>> since >>>>>> nothing is still on a boat and things rub all the time and the >>>>>> >>>>> other
>>>>>> is >>>>>> >>>>> >>>>> >>>> never leave a corner anywhere that is not radiused. Those sharp >>> >>>> >>>> >>>>> corners >>>>>> >>>>> >>>>> >>>> in >>> >>>> >>>> a fall can be deadly. >>>> >>>>> >>>>> Have fun. >>>>>> Tom B >>>>>> <https://www.avast.com/sig-email> This email has been sent from >>>>>> a >>>>>> virus-free computer protected by Avast. >>>>>> www.avast.com <https://www.avast.com/sig-email> >>>>>> <#DDB4FAA8-2DD7-40BB-A1B8-4E2AA1F9FDF2> >>>>>> >>>>>> On Mon, Feb 8, 2016 at 11:41 PM, Jazzy <jazzydaze@gmail.com> >>>>>> >>>>> wrote:
>>>>>> So I'm running mast wires. ..there's an exit hole that's about >>>>>> 1/4 >>>>>> >>>>>> inch >>>>>> >>>>> >>>>> >>>> down near the bottom of the mast. It would be helpful if it was >>> >>>> >>>> >>>>> bigger >>>>>>> >>>>>> >>>>>> >>>>> but >>> >>>> >>>> I don't want a portable folding mast. Can I enlarge it safely? >>>>> >>>> And
>>>>>>> how >>>>>>> >>>>>> >>>>>> >>>>> much? >>>> >>>>> >>>>> >>>>>> Jazz >>>>>>> >>>>>>> >>>>>>> -- >>>>>>> >>>>>>> John Schinnerer - M.A., Whole Systems Design >>>>>> >>>>> -------------------------------------------- >>>>> - Eco-Living - >>>>> Whole Systems Design Services >>>>> People - Place - Learning - Integration >>>>> john@eco-living.net - 510.982.1334 >>>>> http://eco-living.net >>>>> http://sociocracyconsulting.com >>>>> >>>>> >>>>> >>>>> >>>>> >>>> -- >>> >> John Schinnerer - M.A., Whole Systems Design > -------------------------------------------- > - Eco-Living - > Whole Systems Design Services > People - Place - Learning - Integration > john@eco-living.net - 510.982.1334 > http://eco-living.net > http://sociocracyconsulting.com > > > > -- John Schinnerer - M.A., Whole Systems Design
- Eco-Living - Whole Systems Design Services People - Place - Learning - Integration john@eco-living.net - 510.982.1334 http://eco-living.net http://sociocracyconsulting.com
-- John Schinnerer - M.A., Whole Systems Design
- Eco-Living - Whole Systems Design Services People - Place - Learning - Integration john@eco-living.net - 510.982.1334 http://eco-living.net http://sociocracyconsulting.com
-- John Schinnerer - M.A., Whole Systems Design -------------------------------------------- - Eco-Living - Whole Systems Design Services People - Place - Learning - Integration john@eco-living.net - 510.982.1334 http://eco-living.net http://sociocracyconsulting.com
Tidy! Check it.... https://www.dropbox.com/s/s1xr6uoyydgam3s/20160210_135756.jpg?dl=0 https://www.dropbox.com/s/mlm5bwxots5ekrt/20160210_135728.jpg?dl=0 Hoping to get it all wired inside tomorrow. -= Jazz On Wed, Feb 10, 2016 at 1:09 PM, John Schinnerer <john@eco-living.net> wrote:
As far as I know, it seals at whatever tightness the part gets tightened to. There would just be more of it left filling the gaps, less squeezed out, when bedding something less tight.
So far I've just used it for re-bedding some cabin top cam cleats, which need to be tightened "enough but not too much," and it worked fine.
cheers, John S.
On 02/09/2016 10:02 PM, Larry Yake wrote:
Good article. Sounds like I just didn't use the correct method of tightening it slowly over several days. One area where I would still avoid using it though, is where you can't really cinch the bolts down tight for fear of crushing the surface. He does recommend large backing plates to overcome that, but in some situations that's not possible or desirable.
On Tue, Feb 9, 2016 at 9:36 PM, John Schinnerer <john@eco-living.net> wrote:
It will squeeze out, yes - the link I posted, he explains that it will
ooze as you finish the tightening. It does stop once the piece is as snug as can get and all that's there to squeeze out squeezes out (the rest is still there doing the sealing). For me, a way better "mess" to clean up than 4200 or 5200 or anything similar. It's so much easier to work with, no need to mask anything, way cheaper, etc. - having seen people wrestle with 4200/5200 on club boats I thought "there must be a better way" and a few years later heard about the butyl. As the link describes, it was used by most quality builders into the 70's but was dropped as economics got tighter due to being more labor intensive, even if a better long-term method.
cheers, John S.
On 02/09/2016 09:27 PM, Larry Yake wrote:
One problem that you may run into with butyl tape (I did), is that since
it doesn't harden, it continues to "bleed" out from around your fitting. I redid all the deck fittings on a boat a couple years ago with it, using top quality butyl by the way, and ended up having to trim the edges around the fittings several times to keep it looking clean and tidy. I eventually sold that boat, so I don't know if the problem still continues. If you don't care about the "bleed", it's great stuff.
Larry Y
On Tue, Feb 9, 2016 at 9:17 PM, Jazzy <jazzydaze@gmail.com> wrote:
Ahhh I seeeee! And your shiny white sails...that's on the list
too...oieeee
Jazz On Feb 9, 2016 8:55 PM, "John Schinnerer" <john@eco-living.net> wrote:
This is best shot I can find at the moment of my hatch - side view, slid
forward - you can see the two stiffeners splitting hatch into thirds. Nothing bracing the rear edge.
You can do windows with butyl I've read, depending on if there is a frame around them and how the frame beds. Somewhere I found another site with a how-to of someone re-bedding their portlights with butyl - those were flanged ports, different than the inside/outside aluminum frames on my
M17
windows. Haven't looked at those yet.
cheers, John S.
On 02/09/2016 08:42 PM, Jazzy wrote:
I've seen the butyl but was thinking it was for Windows and
> > such...grrrrr.
When it leaks I'll butyl! And I'll have a looksie at the hatch, hadn't
> even noticed! > > Jazz > On Feb 9, 2016 8:38 PM, "John Schinnerer" <john@eco-living.net> > wrote: > > Congratulations, and thanks for all the pics...I learn something from > > almost every one I see of a sister ship. For example: >> >> Your hatch has only one wood stiffener, at very rear. Mine has two, >> splitting the hatch into thirds (front/middle/rear); and the rear >> edge >> >> of >
the hatch is cracked in the center, undoubtedly from being stood on a
> time >> too many with no reinforcing. So I'll move one of mine to the rear, >> or >> add >> one... >> >> Your mainsheet is what I was thinking when you described it - >> >> essentially >
same as a Potter 19 or an Ensenada 20 (and probably lotsa others but
> those >> are two I've sailed with same basic mainsheet rigging). Definitely >> out >> >> of >
the way, but I'm not crazy about having the sheet always lead from one
> side. It's an awkward angle to mind the sheet when sitting on the >> same >> side, for me anyhow. >> >> Wow, fancy through-deck connector! >> A tip for anything else you need to bed, or re-bed - ditch the nasty >> >> (and >
pricey) sticky white goo, use good quality butyl tape (not 'tape' like
> scotch or masking; comes on a roll but is a flexible bedding >> compound, >> used >> on boats, RVs, etc.). For example this Dicor brand stuff: >> >> >> >> >>
http://www.amazon.com/gp/product/B001FCB4JS?psc=1&redirect=true&ref_=oh_aui_...
Seals "forever" and never hardens and also comes off easy. >> Here is one good site with photos and details of how & why, this is >> >> page >
one of three, page two gets into more details - this guy also sells the
> tape he uses, see page three (I did some research and Dicor came up >> as >> >> a >
quality product so I went with that):
> http://www.pbase.com/mainecruising/rebedding_hardware&page=1 >> >> cheers, >> John S. >> >> On 02/09/2016 07:09 PM, Jazzy wrote: >> >> Ok, so all drilled and the through deck is in. Its loosely screwed >> >> with >
sealant drying for tightening tomorrow. Steaming/decklight is
> installed. >>> Anchor light is installed. Tomorrow it gets wired into the switch >>> panel. >>> Gonna need a bigger panel I think, but for now I'll use a couple of >>> switches I have laying around. So here's some pics. I'll try to >>> get >>> steaming light pic tomorrow. It got dark! >>> >>> Here's the through hull... >>> https://www.dropbox.com/s/qn29hc195uyy5x4/20160209_182415.jpg?dl=0 >>> >>> Here's how my mainsheet is rigged, prob not great for racing but >>> >>> totally >> >
out of the way for cruising...
> https://www.dropbox.com/s/rdwb1tvf0jdo7ry/20160209_172631.jpg?dl=0 >>> >>> And here's how it all exited from the mast...seems like I could >>> have >>> done >>> this better, but I'm a noob and it was the best I could think of... >>> https://www.dropbox.com/s/ohw6nliz0wnat89/20160209_152745.jpg?dl=0 >>> >>> And to keep things from being to dull, here's the one and only time >>> >>> I've >> >
been out on it! LOL
> https://www.dropbox.com/s/n3n46bxvd2umdio/20160118_120353.jpg?dl=0 >>> >>> >>> Jazz >>> >>> PS. If you guys are looking for a temp way to share pics until you >>> >>> all >> >
decide on something, DropBox works great. You can put dropbox on your
> phone and your computer and your wifes phone and your wifes computer, >>> and >>> it always stays up to date. If you change something in it on your >>> >>> phone >> >
lets say, it changes everywhere. You just have to "share" your pic
> >>> with >> >
DropBox, then open it in DropBox and right click for the "share
> >>> dropbox >> >
link". The link will automatically go to your clipboard, then you
> just >>> paste in your email. So long as you keep your drop box, your link >>> >>> will >> >
work in here. NOT AFFILIATED, but a cool program! I can look at El
> Nino >>> pics from any computer or phone that has dropbox :) >>> >>> >>> >>> >>> >>> >>> >>> >>> >>> On Tue, Feb 9, 2016 at 4:11 PM, Thomas Buzzi < >>> thomaspbuzzi@gmail.com >>> >>>> >>>> wrote: >>> >>> Hi Larry, >>> >>> Thanks for the suggestion of the foam peanuts since I have already >>> >>>> >>>> run >>> >>
the
> mast wires and can't remember if I used the snap tie trick or not. >>>> Tom B >>>> >>>> This email has been sent from a virus-free computer protected by >>>> >>>> Avast. >>> >>
www.avast.com <https://www.avast.com/sig-email>
> <#DDB4FAA8-2DD7-40BB-A1B8-4E2AA1F9FDF2> >>>> >>>> On Tue, Feb 9, 2016 at 3:34 PM, Larry Yake <larryyake@gmail.com> >>>> wrote: >>>> >>>> Another option to quiet the wire slapping inside the mast is to >>>> fill >>>> >>>> it >>> >>
with styrofoam packing peanuts. A piece of styrofoam swim noodle >>>> >>>>> makes a >>>>> nice "cork" in the ends to keep them from coming out. You also >>>>> get >>>>> >>>>> the >>>> >>> benefit of some flotation. I did this several years ago and it has
> worked >>>>> very well with no issues at all. >>>>> >>>>> Larry Y >>>>> M17 CornDog >>>>> >>>>> On Tue, Feb 9, 2016 at 1:28 PM, John Schinnerer < >>>>> >>>>> john@eco-living.net> >>>> >>> wrote:
> >>>>> Speaking of wires in mast - that you don't want to hear slapping >>>>> all >>>>> >>>>> >>>>> night >>>>>> >>>>>> >>>>> from down in the berth, or just slapping (chafing ;-) in general >>>>> - >>>>> >>>>> one >>>> >>> trick is to put three or four zip-ties every few feet on the wire
> >>>>>> as >>>>> >>>>
you >>>>>> >>>>>> >>>>> >>>>> feed it through, angled in different directions to make a >>>> triangle >>>> or >>>> >>>> >>>>> rectangle of zip-tie ends sticking out and pressing against the >>>>> >>>>>> inside >>>>>> >>>>>> of >>>>>> >>>>>> >>>>> >>>>> the mast and keeping the wire from slapping. >>>> >>>> >>>>> I would use the black more UV- and heat-tolerant ones - even >>>>> though >>>>> >>>>>> >>>>>> inside >>>>>> >>>>>> >>>>> the mast, they will probably last longer than the plain white >>>>> ones. >>>>> >>>>> >>>>>> cheers, >>>>>> John S. >>>>>> >>>>>> >>>>>> On 02/09/2016 07:11 AM, Thomas Buzzi wrote: >>>>>> >>>>>> Jazz, >>>>>> >>>>>> I drilled a 5/8 inch hole six inches up from the bottom of my >>>>>> mast >>>>>> >>>>>>> on >>>>>>> >>>>>>> the >>>>>>> >>>>>>> >>>>>> >>>>>> front face to exit the wires. I then inserted a 1/2 inch rubber >>>>> >>>>> >>>>>> >>>>>> grommet >>>>>>> >>>>>>> >>>>>> >>>>>> (available at hardware stores) in the hole before feeding the >>>>> wires >>>>> >>>> >>>> >>>>> through >>>>> >>>>>> >>>>>> it.. I drilled the hole on the forward side of the mast as >>>>>>> opposed >>>>>>> to >>>>>>> >>>>>>> the >>>>>>> >>>>>>> >>>>>> >>>>>> side thinking about some future accident where I dropped the >>>>> mast >>>>> >>>>> into >>>> >>>
>>>>>> the >>>>>>> >>>>>>> >>>>>> >>>>>> tabernacle and possibly slice through those protruding wires. >>>>> >>>>> >>>>>> Two things I learned about boats, you always design around chafe >>>>>> >>>>>>> since >>>>>>> nothing is still on a boat and things rub all the time and the >>>>>>> >>>>>>> other >>>>>> >>>>>
is >>>>>>> >>>>>>> >>>>>> >>>>>> never leave a corner anywhere that is not radiused. Those sharp >>>>> >>>> >>>> >>>>> >>>>> corners >>>>>> >>>>>>> >>>>>>> >>>>>> >>>>>> in >>>>> >>>> >>>> >>>>> a fall can be deadly. >>>>> >>>>> >>>>>> Have fun. >>>>>> >>>>>>> Tom B >>>>>>> <https://www.avast.com/sig-email> This email has been sent >>>>>>> from >>>>>>> a >>>>>>> virus-free computer protected by Avast. >>>>>>> www.avast.com <https://www.avast.com/sig-email> >>>>>>> <#DDB4FAA8-2DD7-40BB-A1B8-4E2AA1F9FDF2> >>>>>>> >>>>>>> On Mon, Feb 8, 2016 at 11:41 PM, Jazzy <jazzydaze@gmail.com> >>>>>>> >>>>>>> wrote: >>>>>> >>>>>
So I'm running mast wires. ..there's an exit hole that's about >>>>>>> 1/4 >>>>>>> >>>>>>> inch >>>>>>> >>>>>>> >>>>>> >>>>>> down near the bottom of the mast. It would be helpful if it was >>>>> >>>> >>>> >>>>> >>>>> bigger >>>>>> >>>>>>> >>>>>>>> >>>>>>> >>>>>>> but >>>>>> >>>>> >>>> >>>>> I don't want a portable folding mast. Can I enlarge it safely? >>>>> >>>>>> >>>>>> And >>>>> >>>>
how >>>>>>>> >>>>>>>> >>>>>>> >>>>>>> much? >>>>>> >>>>> >>>>> >>>>>> >>>>>> Jazz >>>>>>> >>>>>>>> >>>>>>>> >>>>>>>> -- >>>>>>>> >>>>>>>> John Schinnerer - M.A., Whole Systems Design >>>>>>>> >>>>>>> >>>>>>> -------------------------------------------- >>>>>> - Eco-Living - >>>>>> Whole Systems Design Services >>>>>> People - Place - Learning - Integration >>>>>> john@eco-living.net - 510.982.1334 >>>>>> http://eco-living.net >>>>>> http://sociocracyconsulting.com >>>>>> >>>>>> >>>>>> >>>>>> >>>>>> >>>>>> -- >>>>> >>>> >>>> John Schinnerer - M.A., Whole Systems Design >>> >> -------------------------------------------- >> - Eco-Living - >> Whole Systems Design Services >> People - Place - Learning - Integration >> john@eco-living.net - 510.982.1334 >> http://eco-living.net >> http://sociocracyconsulting.com >> >> >> >> -- >> > John Schinnerer - M.A., Whole Systems Design -------------------------------------------- - Eco-Living - Whole Systems Design Services People - Place - Learning - Integration john@eco-living.net - 510.982.1334 http://eco-living.net http://sociocracyconsulting.com
-- John Schinnerer - M.A., Whole Systems Design
- Eco-Living - Whole Systems Design Services People - Place - Learning - Integration john@eco-living.net - 510.982.1334 http://eco-living.net http://sociocracyconsulting.com
-- John Schinnerer - M.A., Whole Systems Design
- Eco-Living - Whole Systems Design Services People - Place - Learning - Integration john@eco-living.net - 510.982.1334 http://eco-living.net http://sociocracyconsulting.com
On a side note... note the throw PFD under the mast, "Selkie" LOL its been there for 3 owners now. -= Jazz On Wed, Feb 10, 2016 at 2:33 PM, Jazzy <jazzydaze@gmail.com> wrote:
Tidy! Check it.... https://www.dropbox.com/s/s1xr6uoyydgam3s/20160210_135756.jpg?dl=0
https://www.dropbox.com/s/mlm5bwxots5ekrt/20160210_135728.jpg?dl=0
Hoping to get it all wired inside tomorrow.
-= Jazz
On Wed, Feb 10, 2016 at 1:09 PM, John Schinnerer <john@eco-living.net> wrote:
As far as I know, it seals at whatever tightness the part gets tightened to. There would just be more of it left filling the gaps, less squeezed out, when bedding something less tight.
So far I've just used it for re-bedding some cabin top cam cleats, which need to be tightened "enough but not too much," and it worked fine.
cheers, John S.
On 02/09/2016 10:02 PM, Larry Yake wrote:
Good article. Sounds like I just didn't use the correct method of tightening it slowly over several days. One area where I would still avoid using it though, is where you can't really cinch the bolts down tight for fear of crushing the surface. He does recommend large backing plates to overcome that, but in some situations that's not possible or desirable.
On Tue, Feb 9, 2016 at 9:36 PM, John Schinnerer <john@eco-living.net> wrote:
It will squeeze out, yes - the link I posted, he explains that it will
ooze as you finish the tightening. It does stop once the piece is as snug as can get and all that's there to squeeze out squeezes out (the rest is still there doing the sealing). For me, a way better "mess" to clean up than 4200 or 5200 or anything similar. It's so much easier to work with, no need to mask anything, way cheaper, etc. - having seen people wrestle with 4200/5200 on club boats I thought "there must be a better way" and a few years later heard about the butyl. As the link describes, it was used by most quality builders into the 70's but was dropped as economics got tighter due to being more labor intensive, even if a better long-term method.
cheers, John S.
On 02/09/2016 09:27 PM, Larry Yake wrote:
One problem that you may run into with butyl tape (I did), is that since
it doesn't harden, it continues to "bleed" out from around your fitting. I redid all the deck fittings on a boat a couple years ago with it, using top quality butyl by the way, and ended up having to trim the edges around the fittings several times to keep it looking clean and tidy. I eventually sold that boat, so I don't know if the problem still continues. If you don't care about the "bleed", it's great stuff.
Larry Y
On Tue, Feb 9, 2016 at 9:17 PM, Jazzy <jazzydaze@gmail.com> wrote:
Ahhh I seeeee! And your shiny white sails...that's on the list
too...oieeee
Jazz On Feb 9, 2016 8:55 PM, "John Schinnerer" <john@eco-living.net> wrote:
This is best shot I can find at the moment of my hatch - side view, slid
> forward - you can see the two stiffeners splitting hatch into thirds. > Nothing bracing the rear edge. > > You can do windows with butyl I've read, depending on if there is a > frame > around them and how the frame beds. Somewhere I found another site > with > a > how-to of someone re-bedding their portlights with butyl - those were > flanged ports, different than the inside/outside aluminum frames on > my > > M17
windows. Haven't looked at those yet. > > cheers, > John S. > > On 02/09/2016 08:42 PM, Jazzy wrote: > > I've seen the butyl but was thinking it was for Windows and > >> >> such...grrrrr. >
When it leaks I'll butyl! And I'll have a looksie at the hatch, > hadn't > >> even noticed! >> >> Jazz >> On Feb 9, 2016 8:38 PM, "John Schinnerer" <john@eco-living.net> >> wrote: >> >> Congratulations, and thanks for all the pics...I learn something >> from >> >> almost every one I see of a sister ship. For example: >>> >>> Your hatch has only one wood stiffener, at very rear. Mine has two, >>> splitting the hatch into thirds (front/middle/rear); and the rear >>> edge >>> >>> of >> > the hatch is cracked in the center, undoubtedly from being stood on a > >> time >>> too many with no reinforcing. So I'll move one of mine to the >>> rear, or >>> add >>> one... >>> >>> Your mainsheet is what I was thinking when you described it - >>> >>> essentially >> > same as a Potter 19 or an Ensenada 20 (and probably lotsa others but > >> those >>> are two I've sailed with same basic mainsheet rigging). Definitely >>> out >>> >>> of >> > the way, but I'm not crazy about having the sheet always lead from one > >> side. It's an awkward angle to mind the sheet when sitting on the >>> same >>> side, for me anyhow. >>> >>> Wow, fancy through-deck connector! >>> A tip for anything else you need to bed, or re-bed - ditch the >>> nasty >>> >>> (and >> > pricey) sticky white goo, use good quality butyl tape (not 'tape' like > >> scotch or masking; comes on a roll but is a flexible bedding >>> compound, >>> used >>> on boats, RVs, etc.). For example this Dicor brand stuff: >>> >>> >>> >>> >>> http://www.amazon.com/gp/product/B001FCB4JS?psc=1&redirect=true&ref_=oh_aui_...
> Seals "forever" and never hardens and also comes off easy. >>> Here is one good site with photos and details of how & why, this is >>> >>> page >> > one of three, page two gets into more details - this guy also sells > the > >> tape he uses, see page three (I did some research and Dicor came up >>> as >>> >>> a >> > quality product so I went with that): > >> http://www.pbase.com/mainecruising/rebedding_hardware&page=1 >>> >>> cheers, >>> John S. >>> >>> On 02/09/2016 07:09 PM, Jazzy wrote: >>> >>> Ok, so all drilled and the through deck is in. Its loosely screwed >>> >>> with >> > sealant drying for tightening tomorrow. Steaming/decklight is > >> installed. >>>> Anchor light is installed. Tomorrow it gets wired into the switch >>>> panel. >>>> Gonna need a bigger panel I think, but for now I'll use a couple >>>> of >>>> switches I have laying around. So here's some pics. I'll try to >>>> get >>>> steaming light pic tomorrow. It got dark! >>>> >>>> Here's the through hull... >>>> https://www.dropbox.com/s/qn29hc195uyy5x4/20160209_182415.jpg?dl=0 >>>> >>>> Here's how my mainsheet is rigged, prob not great for racing but >>>> >>>> totally >>> >> out of the way for cruising... > >> https://www.dropbox.com/s/rdwb1tvf0jdo7ry/20160209_172631.jpg?dl=0 >>>> >>>> And here's how it all exited from the mast...seems like I could >>>> have >>>> done >>>> this better, but I'm a noob and it was the best I could think >>>> of... >>>> https://www.dropbox.com/s/ohw6nliz0wnat89/20160209_152745.jpg?dl=0 >>>> >>>> And to keep things from being to dull, here's the one and only >>>> time >>>> >>>> I've >>> >> been out on it! LOL > >> https://www.dropbox.com/s/n3n46bxvd2umdio/20160118_120353.jpg?dl=0 >>>> >>>> >>>> Jazz >>>> >>>> PS. If you guys are looking for a temp way to share pics until >>>> you >>>> >>>> all >>> >> decide on something, DropBox works great. You can put dropbox on your > >> phone and your computer and your wifes phone and your wifes >>>> computer, >>>> and >>>> it always stays up to date. If you change something in it on your >>>> >>>> phone >>> >> lets say, it changes everywhere. You just have to "share" your pic > >> >>>> with >>> >> DropBox, then open it in DropBox and right click for the "share > >> >>>> dropbox >>> >> link". The link will automatically go to your clipboard, then you > >> just >>>> paste in your email. So long as you keep your drop box, your link >>>> >>>> will >>> >> work in here. NOT AFFILIATED, but a cool program! I can look at El > >> Nino >>>> pics from any computer or phone that has dropbox :) >>>> >>>> >>>> >>>> >>>> >>>> >>>> >>>> >>>> >>>> On Tue, Feb 9, 2016 at 4:11 PM, Thomas Buzzi < >>>> thomaspbuzzi@gmail.com >>>> >>>>> >>>>> wrote: >>>> >>>> Hi Larry, >>>> >>>> Thanks for the suggestion of the foam peanuts since I have already >>>> >>>>> >>>>> run >>>> >>> the > >> mast wires and can't remember if I used the snap tie trick or not. >>>>> Tom B >>>>> >>>>> This email has been sent from a virus-free computer protected by >>>>> >>>>> Avast. >>>> >>> www.avast.com <https://www.avast.com/sig-email> > >> <#DDB4FAA8-2DD7-40BB-A1B8-4E2AA1F9FDF2> >>>>> >>>>> On Tue, Feb 9, 2016 at 3:34 PM, Larry Yake <larryyake@gmail.com> >>>>> wrote: >>>>> >>>>> Another option to quiet the wire slapping inside the mast is to >>>>> fill >>>>> >>>>> it >>>> >>>
> with styrofoam packing peanuts. A piece of styrofoam swim noodle >>>>> >>>>>> makes a >>>>>> nice "cork" in the ends to keep them from coming out. You also >>>>>> get >>>>>> >>>>>> the >>>>> >>>> benefit of some flotation. I did this several years ago and it has > >> worked >>>>>> very well with no issues at all. >>>>>> >>>>>> Larry Y >>>>>> M17 CornDog >>>>>> >>>>>> On Tue, Feb 9, 2016 at 1:28 PM, John Schinnerer < >>>>>> >>>>>> john@eco-living.net> >>>>> >>>> wrote: > >> >>>>>> Speaking of wires in mast - that you don't want to hear slapping >>>>>> all >>>>>> >>>>>> >>>>>> night >>>>>>> >>>>>>> >>>>>> from down in the berth, or just slapping (chafing ;-) in >>>>>> general - >>>>>> >>>>>> one >>>>> >>>> trick is to put three or four zip-ties every few feet on the wire > >> >>>>>>> as >>>>>> >>>>>
> you >>>>>>> >>>>>>> >>>>>> >>>>>> feed it through, angled in different directions to make a >>>>> triangle >>>>> or >>>>> >>>>> >>>>>> rectangle of zip-tie ends sticking out and pressing against the >>>>>> >>>>>>> inside >>>>>>> >>>>>>> of >>>>>>> >>>>>>> >>>>>> >>>>>> the mast and keeping the wire from slapping. >>>>> >>>>> >>>>>> I would use the black more UV- and heat-tolerant ones - even >>>>>> though >>>>>> >>>>>>> >>>>>>> inside >>>>>>> >>>>>>> >>>>>> the mast, they will probably last longer than the plain white >>>>>> ones. >>>>>> >>>>>> >>>>>>> cheers, >>>>>>> John S. >>>>>>> >>>>>>> >>>>>>> On 02/09/2016 07:11 AM, Thomas Buzzi wrote: >>>>>>> >>>>>>> Jazz, >>>>>>> >>>>>>> I drilled a 5/8 inch hole six inches up from the bottom of my >>>>>>> mast >>>>>>> >>>>>>>> on >>>>>>>> >>>>>>>> the >>>>>>>> >>>>>>>> >>>>>>> >>>>>>> front face to exit the wires. I then inserted a 1/2 inch rubber >>>>>> >>>>>> >>>>>>> >>>>>>> grommet >>>>>>>> >>>>>>>> >>>>>>> >>>>>>> (available at hardware stores) in the hole before feeding the >>>>>> wires >>>>>> >>>>> >>>>> >>>>>> through >>>>>> >>>>>>> >>>>>>> it.. I drilled the hole on the forward side of the mast as >>>>>>>> opposed >>>>>>>> to >>>>>>>> >>>>>>>> the >>>>>>>> >>>>>>>> >>>>>>> >>>>>>> side thinking about some future accident where I dropped the >>>>>> mast >>>>>> >>>>>> into >>>>> >>>>
> >>>>>>> the >>>>>>>> >>>>>>>> >>>>>>> >>>>>>> tabernacle and possibly slice through those protruding wires. >>>>>> >>>>>> >>>>>>> Two things I learned about boats, you always design around >>>>>>> chafe >>>>>>> >>>>>>>> since >>>>>>>> nothing is still on a boat and things rub all the time and the >>>>>>>> >>>>>>>> other >>>>>>> >>>>>>
> is >>>>>>>> >>>>>>>> >>>>>>> >>>>>>> never leave a corner anywhere that is not radiused. Those sharp >>>>>> >>>>> >>>>> >>>>>> >>>>>> corners >>>>>>> >>>>>>>> >>>>>>>> >>>>>>> >>>>>>> in >>>>>> >>>>> >>>>> >>>>>> a fall can be deadly. >>>>>> >>>>>> >>>>>>> Have fun. >>>>>>> >>>>>>>> Tom B >>>>>>>> <https://www.avast.com/sig-email> This email has been sent >>>>>>>> from >>>>>>>> a >>>>>>>> virus-free computer protected by Avast. >>>>>>>> www.avast.com <https://www.avast.com/sig-email> >>>>>>>> <#DDB4FAA8-2DD7-40BB-A1B8-4E2AA1F9FDF2> >>>>>>>> >>>>>>>> On Mon, Feb 8, 2016 at 11:41 PM, Jazzy <jazzydaze@gmail.com> >>>>>>>> >>>>>>>> wrote: >>>>>>> >>>>>>
> So I'm running mast wires. ..there's an exit hole that's about >>>>>>>> 1/4 >>>>>>>> >>>>>>>> inch >>>>>>>> >>>>>>>> >>>>>>> >>>>>>> down near the bottom of the mast. It would be helpful if it >>>>>> was >>>>>> >>>>> >>>>> >>>>>> >>>>>> bigger >>>>>>> >>>>>>>> >>>>>>>>> >>>>>>>> >>>>>>>> but >>>>>>> >>>>>> >>>>> >>>>>> I don't want a portable folding mast. Can I enlarge it safely? >>>>>> >>>>>>> >>>>>>> And >>>>>> >>>>>
> how >>>>>>>>> >>>>>>>>> >>>>>>>> >>>>>>>> much? >>>>>>> >>>>>> >>>>>> >>>>>>> >>>>>>> Jazz >>>>>>>> >>>>>>>>> >>>>>>>>> >>>>>>>>> -- >>>>>>>>> >>>>>>>>> John Schinnerer - M.A., Whole Systems Design >>>>>>>>> >>>>>>>> >>>>>>>> -------------------------------------------- >>>>>>> - Eco-Living - >>>>>>> Whole Systems Design Services >>>>>>> People - Place - Learning - Integration >>>>>>> john@eco-living.net - 510.982.1334 >>>>>>> http://eco-living.net >>>>>>> http://sociocracyconsulting.com >>>>>>> >>>>>>> >>>>>>> >>>>>>> >>>>>>> >>>>>>> -- >>>>>> >>>>> >>>>> John Schinnerer - M.A., Whole Systems Design >>>> >>> -------------------------------------------- >>> - Eco-Living - >>> Whole Systems Design Services >>> People - Place - Learning - Integration >>> john@eco-living.net - 510.982.1334 >>> http://eco-living.net >>> http://sociocracyconsulting.com >>> >>> >>> >>> -- >>> >> John Schinnerer - M.A., Whole Systems Design > -------------------------------------------- > - Eco-Living - > Whole Systems Design Services > People - Place - Learning - Integration > john@eco-living.net - 510.982.1334 > http://eco-living.net > http://sociocracyconsulting.com > > > -- John Schinnerer - M.A., Whole Systems Design
- Eco-Living - Whole Systems Design Services People - Place - Learning - Integration john@eco-living.net - 510.982.1334 http://eco-living.net http://sociocracyconsulting.com
-- John Schinnerer - M.A., Whole Systems Design
- Eco-Living - Whole Systems Design Services People - Place - Learning - Integration john@eco-living.net - 510.982.1334 http://eco-living.net http://sociocracyconsulting.com
Looks good,Jazz. I see you still have the stock sheaves at the mast head. They are wire/rope compatible. So you can run either for halyards. On Wed, Feb 10, 2016 at 4:33 PM, Jazzy <jazzydaze@gmail.com> wrote:
Tidy! Check it.... https://www.dropbox.com/s/s1xr6uoyydgam3s/20160210_135756.jpg?dl=0
https://www.dropbox.com/s/mlm5bwxots5ekrt/20160210_135728.jpg?dl=0
Hoping to get it all wired inside tomorrow.
-= Jazz
On Wed, Feb 10, 2016 at 1:09 PM, John Schinnerer <john@eco-living.net> wrote:
As far as I know, it seals at whatever tightness the part gets tightened to. There would just be more of it left filling the gaps, less squeezed out, when bedding something less tight.
So far I've just used it for re-bedding some cabin top cam cleats, which need to be tightened "enough but not too much," and it worked fine.
cheers, John S.
On 02/09/2016 10:02 PM, Larry Yake wrote:
Good article. Sounds like I just didn't use the correct method of tightening it slowly over several days. One area where I would still avoid using it though, is where you can't really cinch the bolts down tight for fear of crushing the surface. He does recommend large backing plates to overcome that, but in some situations that's not possible or desirable.
On Tue, Feb 9, 2016 at 9:36 PM, John Schinnerer <john@eco-living.net> wrote:
It will squeeze out, yes - the link I posted, he explains that it will
ooze as you finish the tightening. It does stop once the piece is as snug as can get and all that's there to squeeze out squeezes out (the rest is still there doing the sealing). For me, a way better "mess" to clean up than 4200 or 5200 or anything similar. It's so much easier to work with, no need to mask anything, way cheaper, etc. - having seen people wrestle with 4200/5200 on club boats I thought "there must be a better way" and a few years later heard about the butyl. As the link describes, it was used by most quality builders into the 70's but was dropped as economics got tighter due to being more labor intensive, even if a better long-term method.
cheers, John S.
On 02/09/2016 09:27 PM, Larry Yake wrote:
One problem that you may run into with butyl tape (I did), is that since
it doesn't harden, it continues to "bleed" out from around your fitting. I redid all the deck fittings on a boat a couple years ago with it, using top quality butyl by the way, and ended up having to trim the edges around the fittings several times to keep it looking clean and tidy. I eventually sold that boat, so I don't know if the problem still continues. If you don't care about the "bleed", it's great stuff.
Larry Y
On Tue, Feb 9, 2016 at 9:17 PM, Jazzy <jazzydaze@gmail.com> wrote:
Ahhh I seeeee! And your shiny white sails...that's on the list
too...oieeee
Jazz On Feb 9, 2016 8:55 PM, "John Schinnerer" <john@eco-living.net> wrote:
This is best shot I can find at the moment of my hatch - side view, slid
> forward - you can see the two stiffeners splitting hatch into thirds. > Nothing bracing the rear edge. > > You can do windows with butyl I've read, depending on if there is a > frame > around them and how the frame beds. Somewhere I found another site > with > a > how-to of someone re-bedding their portlights with butyl - those were > flanged ports, different than the inside/outside aluminum frames on my > > M17
windows. Haven't looked at those yet. > > cheers, > John S. > > On 02/09/2016 08:42 PM, Jazzy wrote: > > I've seen the butyl but was thinking it was for Windows and > >> >> such...grrrrr. >
When it leaks I'll butyl! And I'll have a looksie at the hatch, hadn't > >> even noticed! >> >> Jazz >> On Feb 9, 2016 8:38 PM, "John Schinnerer" <john@eco-living.net> >> wrote: >> >> Congratulations, and thanks for all the pics...I learn something from >> >> almost every one I see of a sister ship. For example: >>> >>> Your hatch has only one wood stiffener, at very rear. Mine has two, >>> splitting the hatch into thirds (front/middle/rear); and the rear >>> edge >>> >>> of >> > the hatch is cracked in the center, undoubtedly from being stood on a > >> time >>> too many with no reinforcing. So I'll move one of mine to the rear, >>> or >>> add >>> one... >>> >>> Your mainsheet is what I was thinking when you described it - >>> >>> essentially >> > same as a Potter 19 or an Ensenada 20 (and probably lotsa others but > >> those >>> are two I've sailed with same basic mainsheet rigging). Definitely >>> out >>> >>> of >> > the way, but I'm not crazy about having the sheet always lead from one > >> side. It's an awkward angle to mind the sheet when sitting on the >>> same >>> side, for me anyhow. >>> >>> Wow, fancy through-deck connector! >>> A tip for anything else you need to bed, or re-bed - ditch the nasty >>> >>> (and >> > pricey) sticky white goo, use good quality butyl tape (not 'tape' like > >> scotch or masking; comes on a roll but is a flexible bedding >>> compound, >>> used >>> on boats, RVs, etc.). For example this Dicor brand stuff: >>> >>> >>> >>> >>>
http://www.amazon.com/gp/product/B001FCB4JS?psc=1&redirect=true&ref_=oh_aui_...
> Seals "forever" and never hardens and also comes off easy. >>> Here is one good site with photos and details of how & why, this
is
>>> >>> page >> > one of three, page two gets into more details - this guy also sells the > >> tape he uses, see page three (I did some research and Dicor came up >>> as >>> >>> a >> > quality product so I went with that): > >> http://www.pbase.com/mainecruising/rebedding_hardware&page=1 >>> >>> cheers, >>> John S. >>> >>> On 02/09/2016 07:09 PM, Jazzy wrote: >>> >>> Ok, so all drilled and the through deck is in. Its loosely screwed >>> >>> with >> > sealant drying for tightening tomorrow. Steaming/decklight is > >> installed. >>>> Anchor light is installed. Tomorrow it gets wired into the switch >>>> panel. >>>> Gonna need a bigger panel I think, but for now I'll use a couple of >>>> switches I have laying around. So here's some pics. I'll try to >>>> get >>>> steaming light pic tomorrow. It got dark! >>>> >>>> Here's the through hull... >>>> https://www.dropbox.com/s/qn29hc195uyy5x4/20160209_182415.jpg?dl=0 >>>> >>>> Here's how my mainsheet is rigged, prob not great for racing but >>>> >>>> totally >>> >> out of the way for cruising... > >> https://www.dropbox.com/s/rdwb1tvf0jdo7ry/20160209_172631.jpg?dl=0 >>>> >>>> And here's how it all exited from the mast...seems like I could >>>> have >>>> done >>>> this better, but I'm a noob and it was the best I could think of... >>>> https://www.dropbox.com/s/ohw6nliz0wnat89/20160209_152745.jpg?dl=0 >>>> >>>> And to keep things from being to dull, here's the one and only time >>>> >>>> I've >>> >> been out on it! LOL > >> https://www.dropbox.com/s/n3n46bxvd2umdio/20160118_120353.jpg?dl=0 >>>> >>>> >>>> Jazz >>>> >>>> PS. If you guys are looking for a temp way to share pics until you >>>> >>>> all >>> >> decide on something, DropBox works great. You can put dropbox on your > >> phone and your computer and your wifes phone and your wifes computer, >>>> and >>>> it always stays up to date. If you change something in it on your >>>> >>>> phone >>> >> lets say, it changes everywhere. You just have to "share" your pic > >> >>>> with >>> >> DropBox, then open it in DropBox and right click for the "share > >> >>>> dropbox >>> >> link". The link will automatically go to your clipboard, then you > >> just >>>> paste in your email. So long as you keep your drop box, your link >>>> >>>> will >>> >> work in here. NOT AFFILIATED, but a cool program! I can look at El > >> Nino >>>> pics from any computer or phone that has dropbox :) >>>> >>>> >>>> >>>> >>>> >>>> >>>> >>>> >>>> >>>> On Tue, Feb 9, 2016 at 4:11 PM, Thomas Buzzi < >>>> thomaspbuzzi@gmail.com >>>> >>>>> >>>>> wrote: >>>> >>>> Hi Larry, >>>> >>>> Thanks for the suggestion of the foam peanuts since I have already >>>> >>>>> >>>>> run >>>> >>> the > >> mast wires and can't remember if I used the snap tie trick or not. >>>>> Tom B >>>>> >>>>> This email has been sent from a virus-free computer protected by >>>>> >>>>> Avast. >>>> >>> www.avast.com <https://www.avast.com/sig-email> > >> <#DDB4FAA8-2DD7-40BB-A1B8-4E2AA1F9FDF2> >>>>> >>>>> On Tue, Feb 9, 2016 at 3:34 PM, Larry Yake <larryyake@gmail.com
>>>>> wrote: >>>>> >>>>> Another option to quiet the wire slapping inside the mast is to >>>>> fill >>>>> >>>>> it >>>> >>>
> with styrofoam packing peanuts. A piece of styrofoam swim noodle >>>>> >>>>>> makes a >>>>>> nice "cork" in the ends to keep them from coming out. You also >>>>>> get >>>>>> >>>>>> the >>>>> >>>> benefit of some flotation. I did this several years ago and it has > >> worked >>>>>> very well with no issues at all. >>>>>> >>>>>> Larry Y >>>>>> M17 CornDog >>>>>> >>>>>> On Tue, Feb 9, 2016 at 1:28 PM, John Schinnerer < >>>>>> >>>>>> john@eco-living.net> >>>>> >>>> wrote: > >> >>>>>> Speaking of wires in mast - that you don't want to hear slapping >>>>>> all >>>>>> >>>>>> >>>>>> night >>>>>>> >>>>>>> >>>>>> from down in the berth, or just slapping (chafing ;-) in general >>>>>> - >>>>>> >>>>>> one >>>>> >>>> trick is to put three or four zip-ties every few feet on the wire > >> >>>>>>> as >>>>>> >>>>>
> you >>>>>>> >>>>>>> >>>>>> >>>>>> feed it through, angled in different directions to make a >>>>> triangle >>>>> or >>>>> >>>>> >>>>>> rectangle of zip-tie ends sticking out and pressing against the >>>>>> >>>>>>> inside >>>>>>> >>>>>>> of >>>>>>> >>>>>>> >>>>>> >>>>>> the mast and keeping the wire from slapping. >>>>> >>>>> >>>>>> I would use the black more UV- and heat-tolerant ones - even >>>>>> though >>>>>> >>>>>>> >>>>>>> inside >>>>>>> >>>>>>> >>>>>> the mast, they will probably last longer than the plain white >>>>>> ones. >>>>>> >>>>>> >>>>>>> cheers, >>>>>>> John S. >>>>>>> >>>>>>> >>>>>>> On 02/09/2016 07:11 AM, Thomas Buzzi wrote: >>>>>>> >>>>>>> Jazz, >>>>>>> >>>>>>> I drilled a 5/8 inch hole six inches up from the bottom of my >>>>>>> mast >>>>>>> >>>>>>>> on >>>>>>>> >>>>>>>> the >>>>>>>> >>>>>>>> >>>>>>> >>>>>>> front face to exit the wires. I then inserted a 1/2 inch rubber >>>>>> >>>>>> >>>>>>> >>>>>>> grommet >>>>>>>> >>>>>>>> >>>>>>> >>>>>>> (available at hardware stores) in the hole before feeding the >>>>>> wires >>>>>> >>>>> >>>>> >>>>>> through >>>>>> >>>>>>> >>>>>>> it.. I drilled the hole on the forward side of the mast as >>>>>>>> opposed >>>>>>>> to >>>>>>>> >>>>>>>> the >>>>>>>> >>>>>>>> >>>>>>> >>>>>>> side thinking about some future accident where I dropped the >>>>>> mast >>>>>> >>>>>> into >>>>> >>>>
> >>>>>>> the >>>>>>>> >>>>>>>> >>>>>>> >>>>>>> tabernacle and possibly slice through those protruding wires. >>>>>> >>>>>> >>>>>>> Two things I learned about boats, you always design around chafe >>>>>>> >>>>>>>> since >>>>>>>> nothing is still on a boat and things rub all the time and the >>>>>>>> >>>>>>>> other >>>>>>> >>>>>>
> is >>>>>>>> >>>>>>>> >>>>>>> >>>>>>> never leave a corner anywhere that is not radiused. Those sharp >>>>>> >>>>> >>>>> >>>>>> >>>>>> corners >>>>>>> >>>>>>>> >>>>>>>> >>>>>>> >>>>>>> in >>>>>> >>>>> >>>>> >>>>>> a fall can be deadly. >>>>>> >>>>>> >>>>>>> Have fun. >>>>>>> >>>>>>>> Tom B >>>>>>>> <https://www.avast.com/sig-email> This email has been sent >>>>>>>> from >>>>>>>> a >>>>>>>> virus-free computer protected by Avast. >>>>>>>> www.avast.com <https://www.avast.com/sig-email> >>>>>>>> <#DDB4FAA8-2DD7-40BB-A1B8-4E2AA1F9FDF2> >>>>>>>> >>>>>>>> On Mon, Feb 8, 2016 at 11:41 PM, Jazzy <jazzydaze@gmail.com> >>>>>>>> >>>>>>>> wrote: >>>>>>> >>>>>>
> So I'm running mast wires. ..there's an exit hole that's about >>>>>>>> 1/4 >>>>>>>> >>>>>>>> inch >>>>>>>> >>>>>>>> >>>>>>> >>>>>>> down near the bottom of the mast. It would be helpful if it was >>>>>> >>>>> >>>>> >>>>>> >>>>>> bigger >>>>>>> >>>>>>>> >>>>>>>>> >>>>>>>> >>>>>>>> but >>>>>>> >>>>>> >>>>> >>>>>> I don't want a portable folding mast. Can I enlarge it safely? >>>>>> >>>>>>> >>>>>>> And >>>>>> >>>>>
> how >>>>>>>>> >>>>>>>>> >>>>>>>> >>>>>>>> much? >>>>>>> >>>>>> >>>>>> >>>>>>> >>>>>>> Jazz >>>>>>>> >>>>>>>>> >>>>>>>>> >>>>>>>>> -- >>>>>>>>> >>>>>>>>> John Schinnerer - M.A., Whole Systems Design >>>>>>>>> >>>>>>>> >>>>>>>> -------------------------------------------- >>>>>>> - Eco-Living - >>>>>>> Whole Systems Design Services >>>>>>> People - Place - Learning - Integration >>>>>>> john@eco-living.net - 510.982.1334 >>>>>>> http://eco-living.net >>>>>>> http://sociocracyconsulting.com >>>>>>> >>>>>>> >>>>>>> >>>>>>> >>>>>>> >>>>>>> -- >>>>>> >>>>> >>>>> John Schinnerer - M.A., Whole Systems Design >>>> >>> -------------------------------------------- >>> - Eco-Living - >>> Whole Systems Design Services >>> People - Place - Learning - Integration >>> john@eco-living.net - 510.982.1334 >>> http://eco-living.net >>> http://sociocracyconsulting.com >>> >>> >>> >>> -- >>> >> John Schinnerer - M.A., Whole Systems Design > -------------------------------------------- > - Eco-Living - > Whole Systems Design Services > People - Place - Learning - Integration > john@eco-living.net - 510.982.1334 > http://eco-living.net > http://sociocracyconsulting.com > > > -- John Schinnerer - M.A., Whole Systems Design
- Eco-Living - Whole Systems Design Services People - Place - Learning - Integration john@eco-living.net - 510.982.1334 http://eco-living.net http://sociocracyconsulting.com
-- John Schinnerer - M.A., Whole Systems Design
- Eco-Living - Whole Systems Design Services People - Place - Learning - Integration john@eco-living.net - 510.982.1334 http://eco-living.net http://sociocracyconsulting.com
I took out my stock aluminum framed windows and replaced with acrylic. I did make inside wooden frames to match the window dimensions to have something to bolt through to the inside. Also I was able to attach curtain tracks to the wood inside. If you go this route, be SURE to over drill the bolt holes and use flat head bolts so the window can slip slightly as it expands due to heat and contracts due to cold. I have had mine on for a year now and no cracks in the plastic. On Tue, Feb 9, 2016 at 10:55 PM, John Schinnerer <john@eco-living.net> wrote:
This is best shot I can find at the moment of my hatch - side view, slid forward - you can see the two stiffeners splitting hatch into thirds. Nothing bracing the rear edge.
You can do windows with butyl I've read, depending on if there is a frame around them and how the frame beds. Somewhere I found another site with a how-to of someone re-bedding their portlights with butyl - those were flanged ports, different than the inside/outside aluminum frames on my M17 windows. Haven't looked at those yet.
cheers, John S.
On 02/09/2016 08:42 PM, Jazzy wrote:
I've seen the butyl but was thinking it was for Windows and such...grrrrr. When it leaks I'll butyl! And I'll have a looksie at the hatch, hadn't even noticed!
Jazz On Feb 9, 2016 8:38 PM, "John Schinnerer" <john@eco-living.net> wrote:
Congratulations, and thanks for all the pics...I learn something from
almost every one I see of a sister ship. For example:
Your hatch has only one wood stiffener, at very rear. Mine has two, splitting the hatch into thirds (front/middle/rear); and the rear edge of the hatch is cracked in the center, undoubtedly from being stood on a time too many with no reinforcing. So I'll move one of mine to the rear, or add one...
Your mainsheet is what I was thinking when you described it - essentially same as a Potter 19 or an Ensenada 20 (and probably lotsa others but those are two I've sailed with same basic mainsheet rigging). Definitely out of the way, but I'm not crazy about having the sheet always lead from one side. It's an awkward angle to mind the sheet when sitting on the same side, for me anyhow.
Wow, fancy through-deck connector! A tip for anything else you need to bed, or re-bed - ditch the nasty (and pricey) sticky white goo, use good quality butyl tape (not 'tape' like scotch or masking; comes on a roll but is a flexible bedding compound, used on boats, RVs, etc.). For example this Dicor brand stuff:
http://www.amazon.com/gp/product/B001FCB4JS?psc=1&redirect=true&ref_=oh_aui_...
Seals "forever" and never hardens and also comes off easy. Here is one good site with photos and details of how & why, this is page one of three, page two gets into more details - this guy also sells the tape he uses, see page three (I did some research and Dicor came up as a quality product so I went with that): http://www.pbase.com/mainecruising/rebedding_hardware&page=1
cheers, John S.
On 02/09/2016 07:09 PM, Jazzy wrote:
Ok, so all drilled and the through deck is in. Its loosely screwed with
sealant drying for tightening tomorrow. Steaming/decklight is installed. Anchor light is installed. Tomorrow it gets wired into the switch panel. Gonna need a bigger panel I think, but for now I'll use a couple of switches I have laying around. So here's some pics. I'll try to get steaming light pic tomorrow. It got dark!
Here's the through hull... https://www.dropbox.com/s/qn29hc195uyy5x4/20160209_182415.jpg?dl=0
Here's how my mainsheet is rigged, prob not great for racing but totally out of the way for cruising... https://www.dropbox.com/s/rdwb1tvf0jdo7ry/20160209_172631.jpg?dl=0
And here's how it all exited from the mast...seems like I could have done this better, but I'm a noob and it was the best I could think of... https://www.dropbox.com/s/ohw6nliz0wnat89/20160209_152745.jpg?dl=0
And to keep things from being to dull, here's the one and only time I've been out on it! LOL https://www.dropbox.com/s/n3n46bxvd2umdio/20160118_120353.jpg?dl=0
Jazz
PS. If you guys are looking for a temp way to share pics until you all decide on something, DropBox works great. You can put dropbox on your phone and your computer and your wifes phone and your wifes computer, and it always stays up to date. If you change something in it on your phone lets say, it changes everywhere. You just have to "share" your pic with DropBox, then open it in DropBox and right click for the "share dropbox link". The link will automatically go to your clipboard, then you just paste in your email. So long as you keep your drop box, your link will work in here. NOT AFFILIATED, but a cool program! I can look at El Nino pics from any computer or phone that has dropbox :)
On Tue, Feb 9, 2016 at 4:11 PM, Thomas Buzzi <thomaspbuzzi@gmail.com> wrote:
Hi Larry,
Thanks for the suggestion of the foam peanuts since I have already run the mast wires and can't remember if I used the snap tie trick or not. Tom B
This email has been sent from a virus-free computer protected by Avast. www.avast.com <https://www.avast.com/sig-email> <#DDB4FAA8-2DD7-40BB-A1B8-4E2AA1F9FDF2>
On Tue, Feb 9, 2016 at 3:34 PM, Larry Yake <larryyake@gmail.com> wrote:
Another option to quiet the wire slapping inside the mast is to fill it
with styrofoam packing peanuts. A piece of styrofoam swim noodle makes a nice "cork" in the ends to keep them from coming out. You also get the benefit of some flotation. I did this several years ago and it has worked very well with no issues at all.
Larry Y M17 CornDog
On Tue, Feb 9, 2016 at 1:28 PM, John Schinnerer <john@eco-living.net> wrote:
Speaking of wires in mast - that you don't want to hear slapping all
> > night
from down in the berth, or just slapping (chafing ;-) in general - one > trick is to put three or four zip-ties every few feet on the wire as > > you
feed it through, angled in different directions to make a triangle or
> rectangle of zip-tie ends sticking out and pressing against the > inside > > of
the mast and keeping the wire from slapping.
> I would use the black more UV- and heat-tolerant ones - even though > > inside
the mast, they will probably last longer than the plain white ones. > > cheers, > John S. > > > On 02/09/2016 07:11 AM, Thomas Buzzi wrote: > > Jazz, > >> I drilled a 5/8 inch hole six inches up from the bottom of my mast >> on >> >> the >
front face to exit the wires. I then inserted a 1/2 inch rubber > >> >> grommet >
(available at hardware stores) in the hole before feeding the wires
> through >> it.. I drilled the hole on the forward side of the mast as opposed >> to >> >> the >
side thinking about some future accident where I dropped the mast into > >> >> the >
tabernacle and possibly slice through those protruding wires. > >> Two things I learned about boats, you always design around chafe >> since >> nothing is still on a boat and things rub all the time and the other >> >> is >
never leave a corner anywhere that is not radiused. Those sharp
> >> corners >
in
a fall can be deadly. > >> Have fun. >> Tom B >> <https://www.avast.com/sig-email> This email has been sent from a >> virus-free computer protected by Avast. >> www.avast.com <https://www.avast.com/sig-email> >> <#DDB4FAA8-2DD7-40BB-A1B8-4E2AA1F9FDF2> >> >> On Mon, Feb 8, 2016 at 11:41 PM, Jazzy <jazzydaze@gmail.com> wrote: >> >> So I'm running mast wires. ..there's an exit hole that's about 1/4 >> >> inch >
down near the bottom of the mast. It would be helpful if it was
> >>> bigger >> >
but
> I don't want a portable folding mast. Can I enlarge it safely? And >>> >>> how >> > much? > >> >>> Jazz >>> >>> >>> -- >>> >> John Schinnerer - M.A., Whole Systems Design > -------------------------------------------- > - Eco-Living - > Whole Systems Design Services > People - Place - Learning - Integration > john@eco-living.net - 510.982.1334 > http://eco-living.net > http://sociocracyconsulting.com > > > >
-- John Schinnerer - M.A., Whole Systems Design
- Eco-Living - Whole Systems Design Services People - Place - Learning - Integration john@eco-living.net - 510.982.1334 http://eco-living.net http://sociocracyconsulting.com
-- John Schinnerer - M.A., Whole Systems Design
- Eco-Living - Whole Systems Design Services People - Place - Learning - Integration john@eco-living.net - 510.982.1334 http://eco-living.net http://sociocracyconsulting.com
If you are going to use butyl tape be sure it pliable to the touch, you can push a fingertip into it. Otherwise when you tighten down what you are bedding with it it will not compress but hold the fitting up . If you really squeeze it down harder it will keep oozing out over the next month. I bought a can of Dolfinite years ago and I use that. It is the consistency of putty and it is a bit messy but it cleans up easily with paint thinner and when you bolt something down it is done, right then, even at temps below 45 degrees. I have almost two rolls of the butyl tape, I will sell at a good price to someone who wants to go that way. Tom B On Tue, Feb 9, 2016 at 10:37 PM, John Schinnerer <john@eco-living.net> wrote:
Congratulations, and thanks for all the pics...I learn something from almost every one I see of a sister ship. For example:
Your hatch has only one wood stiffener, at very rear. Mine has two, splitting the hatch into thirds (front/middle/rear); and the rear edge of the hatch is cracked in the center, undoubtedly from being stood on a time too many with no reinforcing. So I'll move one of mine to the rear, or add one...
Your mainsheet is what I was thinking when you described it - essentially same as a Potter 19 or an Ensenada 20 (and probably lotsa others but those are two I've sailed with same basic mainsheet rigging). Definitely out of the way, but I'm not crazy about having the sheet always lead from one side. It's an awkward angle to mind the sheet when sitting on the same side, for me anyhow.
Wow, fancy through-deck connector! A tip for anything else you need to bed, or re-bed - ditch the nasty (and pricey) sticky white goo, use good quality butyl tape (not 'tape' like scotch or masking; comes on a roll but is a flexible bedding compound, used on boats, RVs, etc.). For example this Dicor brand stuff:
http://www.amazon.com/gp/product/B001FCB4JS?psc=1&redirect=true&ref_=oh_aui_...
Seals "forever" and never hardens and also comes off easy. Here is one good site with photos and details of how & why, this is page one of three, page two gets into more details - this guy also sells the tape he uses, see page three (I did some research and Dicor came up as a quality product so I went with that): http://www.pbase.com/mainecruising/rebedding_hardware&page=1
cheers, John S.
On 02/09/2016 07:09 PM, Jazzy wrote:
Ok, so all drilled and the through deck is in. Its loosely screwed with sealant drying for tightening tomorrow. Steaming/decklight is installed. Anchor light is installed. Tomorrow it gets wired into the switch panel. Gonna need a bigger panel I think, but for now I'll use a couple of switches I have laying around. So here's some pics. I'll try to get steaming light pic tomorrow. It got dark!
Here's the through hull... https://www.dropbox.com/s/qn29hc195uyy5x4/20160209_182415.jpg?dl=0
Here's how my mainsheet is rigged, prob not great for racing but totally out of the way for cruising... https://www.dropbox.com/s/rdwb1tvf0jdo7ry/20160209_172631.jpg?dl=0
And here's how it all exited from the mast...seems like I could have done this better, but I'm a noob and it was the best I could think of... https://www.dropbox.com/s/ohw6nliz0wnat89/20160209_152745.jpg?dl=0
And to keep things from being to dull, here's the one and only time I've been out on it! LOL https://www.dropbox.com/s/n3n46bxvd2umdio/20160118_120353.jpg?dl=0
Jazz
PS. If you guys are looking for a temp way to share pics until you all decide on something, DropBox works great. You can put dropbox on your phone and your computer and your wifes phone and your wifes computer, and it always stays up to date. If you change something in it on your phone lets say, it changes everywhere. You just have to "share" your pic with DropBox, then open it in DropBox and right click for the "share dropbox link". The link will automatically go to your clipboard, then you just paste in your email. So long as you keep your drop box, your link will work in here. NOT AFFILIATED, but a cool program! I can look at El Nino pics from any computer or phone that has dropbox :)
On Tue, Feb 9, 2016 at 4:11 PM, Thomas Buzzi <thomaspbuzzi@gmail.com> wrote:
Hi Larry,
Thanks for the suggestion of the foam peanuts since I have already run the mast wires and can't remember if I used the snap tie trick or not. Tom B
This email has been sent from a virus-free computer protected by Avast. www.avast.com <https://www.avast.com/sig-email> <#DDB4FAA8-2DD7-40BB-A1B8-4E2AA1F9FDF2>
On Tue, Feb 9, 2016 at 3:34 PM, Larry Yake <larryyake@gmail.com> wrote:
Another option to quiet the wire slapping inside the mast is to fill it
with styrofoam packing peanuts. A piece of styrofoam swim noodle makes a nice "cork" in the ends to keep them from coming out. You also get the benefit of some flotation. I did this several years ago and it has worked very well with no issues at all.
Larry Y M17 CornDog
On Tue, Feb 9, 2016 at 1:28 PM, John Schinnerer <john@eco-living.net> wrote:
Speaking of wires in mast - that you don't want to hear slapping all
night
from down in the berth, or just slapping (chafing ;-) in general - one trick is to put three or four zip-ties every few feet on the wire as
you
feed it through, angled in different directions to make a triangle or
rectangle of zip-tie ends sticking out and pressing against the inside
of
the mast and keeping the wire from slapping.
I would use the black more UV- and heat-tolerant ones - even though
inside
the mast, they will probably last longer than the plain white ones.
cheers, John S.
On 02/09/2016 07:11 AM, Thomas Buzzi wrote:
Jazz,
I drilled a 5/8 inch hole six inches up from the bottom of my mast on
the
front face to exit the wires. I then inserted a 1/2 inch rubber
grommet
(available at hardware stores) in the hole before feeding the wires
through it.. I drilled the hole on the forward side of the mast as opposed to
the
side thinking about some future accident where I dropped the mast into
the
tabernacle and possibly slice through those protruding wires.
Two things I learned about boats, you always design around chafe since nothing is still on a boat and things rub all the time and the other
is
never leave a corner anywhere that is not radiused. Those sharp
corners
in
a fall can be deadly.
Have fun. Tom B <https://www.avast.com/sig-email> This email has been sent from a virus-free computer protected by Avast. www.avast.com <https://www.avast.com/sig-email> <#DDB4FAA8-2DD7-40BB-A1B8-4E2AA1F9FDF2>
On Mon, Feb 8, 2016 at 11:41 PM, Jazzy <jazzydaze@gmail.com> wrote:
So I'm running mast wires. ..there's an exit hole that's about 1/4
inch
down near the bottom of the mast. It would be helpful if it was
> bigger
but
> I don't want a portable folding mast. Can I enlarge it safely? And > how
much?
> > Jazz > > > -- John Schinnerer - M.A., Whole Systems Design
- Eco-Living - Whole Systems Design Services People - Place - Learning - Integration john@eco-living.net - 510.982.1334 http://eco-living.net http://sociocracyconsulting.com
-- John Schinnerer - M.A., Whole Systems Design
- Eco-Living - Whole Systems Design Services People - Place - Learning - Integration john@eco-living.net - 510.982.1334 http://eco-living.net http://sociocracyconsulting.com
On 2/9/2016 3:28 PM, John Schinnerer wrote: John, The same applies to halyards that slap the mast all night: terrible! Tie off the halyards using some bungee cords of the right lengths. You sleep peacefully; no halyard slap on the mast to disturb your slumber (and it helps you hear when the anchor might be dragging....) Connie
Speaking of wires in mast - that you don't want to hear slapping all night from down in the berth, or just slapping (chafing ;-) in general - one trick is to put three or four zip-ties every few feet on the wire as you feed it through, angled in different directions to make a triangle or rectangle of zip-tie ends sticking out and pressing against the inside of the mast and keeping the wire from slapping. I would use the black more UV- and heat-tolerant ones - even though inside the mast, they will probably last longer than the plain white ones.
cheers, John S.
On 02/09/2016 07:11 AM, Thomas Buzzi wrote:
Jazz, I drilled a 5/8 inch hole six inches up from the bottom of my mast on the front face to exit the wires. I then inserted a 1/2 inch rubber grommet (available at hardware stores) in the hole before feeding the wires through it.. I drilled the hole on the forward side of the mast as opposed to the side thinking about some future accident where I dropped the mast into the tabernacle and possibly slice through those protruding wires. Two things I learned about boats, you always design around chafe since nothing is still on a boat and things rub all the time and the other is never leave a corner anywhere that is not radiused. Those sharp corners in a fall can be deadly. Have fun. Tom B <https://www.avast.com/sig-email> This email has been sent from a virus-free computer protected by Avast. www.avast.com <https://www.avast.com/sig-email> <#DDB4FAA8-2DD7-40BB-A1B8-4E2AA1F9FDF2>
On Mon, Feb 8, 2016 at 11:41 PM, Jazzy <jazzydaze@gmail.com> wrote:
So I'm running mast wires. ..there's an exit hole that's about 1/4 inch down near the bottom of the mast. It would be helpful if it was bigger but I don't want a portable folding mast. Can I enlarge it safely? And how much?
Jazz
participants (8)
-
 Conbert Benneck
 -
 Dave Scobie
 -
 David Rifkind
 -
 Jazzy
Jazzy -
 jerry@jerrymontgomery.org
 -
 John Schinnerer
 -
 Larry Yake
 -
 Thomas Buzzi